Everyone seems to be trying out new recipes while we’ve been spending time at home, especially baking! But the availability of yeast and other baking ingredients have been hit or miss, plus if your bread doesn’t turn out, you’ve usually spent a lot of time and effort on something destined for the squirrels, so why not use that flour for another experiment: making ravioli at home!
I have never, ever attempted homemade pasta, though I’ve watched it made many times on various cooking shows. It seems intimidating, and I was lacking the proper equipment, or so I thought. I started poking around at recipes one day and found this one that looked relatively simple. It can’t really be that easy, can it? I decided to give it a try.
Making ravioli at home seemed like a good starting point for diving into the challenge of homemade pasta. Not only can you make it 100% your own based on what you put inside, it’s hard to overcook. They simply float to the top of the pot of boiling water when they’re done. Also, they’re great for using up leftover meats, veggies or whatever you have on hand. The ravioli themselves only have to cook for a couple minutes, so those already-cooked leftovers will warm up perfectly! So, armed with a recipe and a few hours, I went to work.
The Method for Making Ravioli at Home
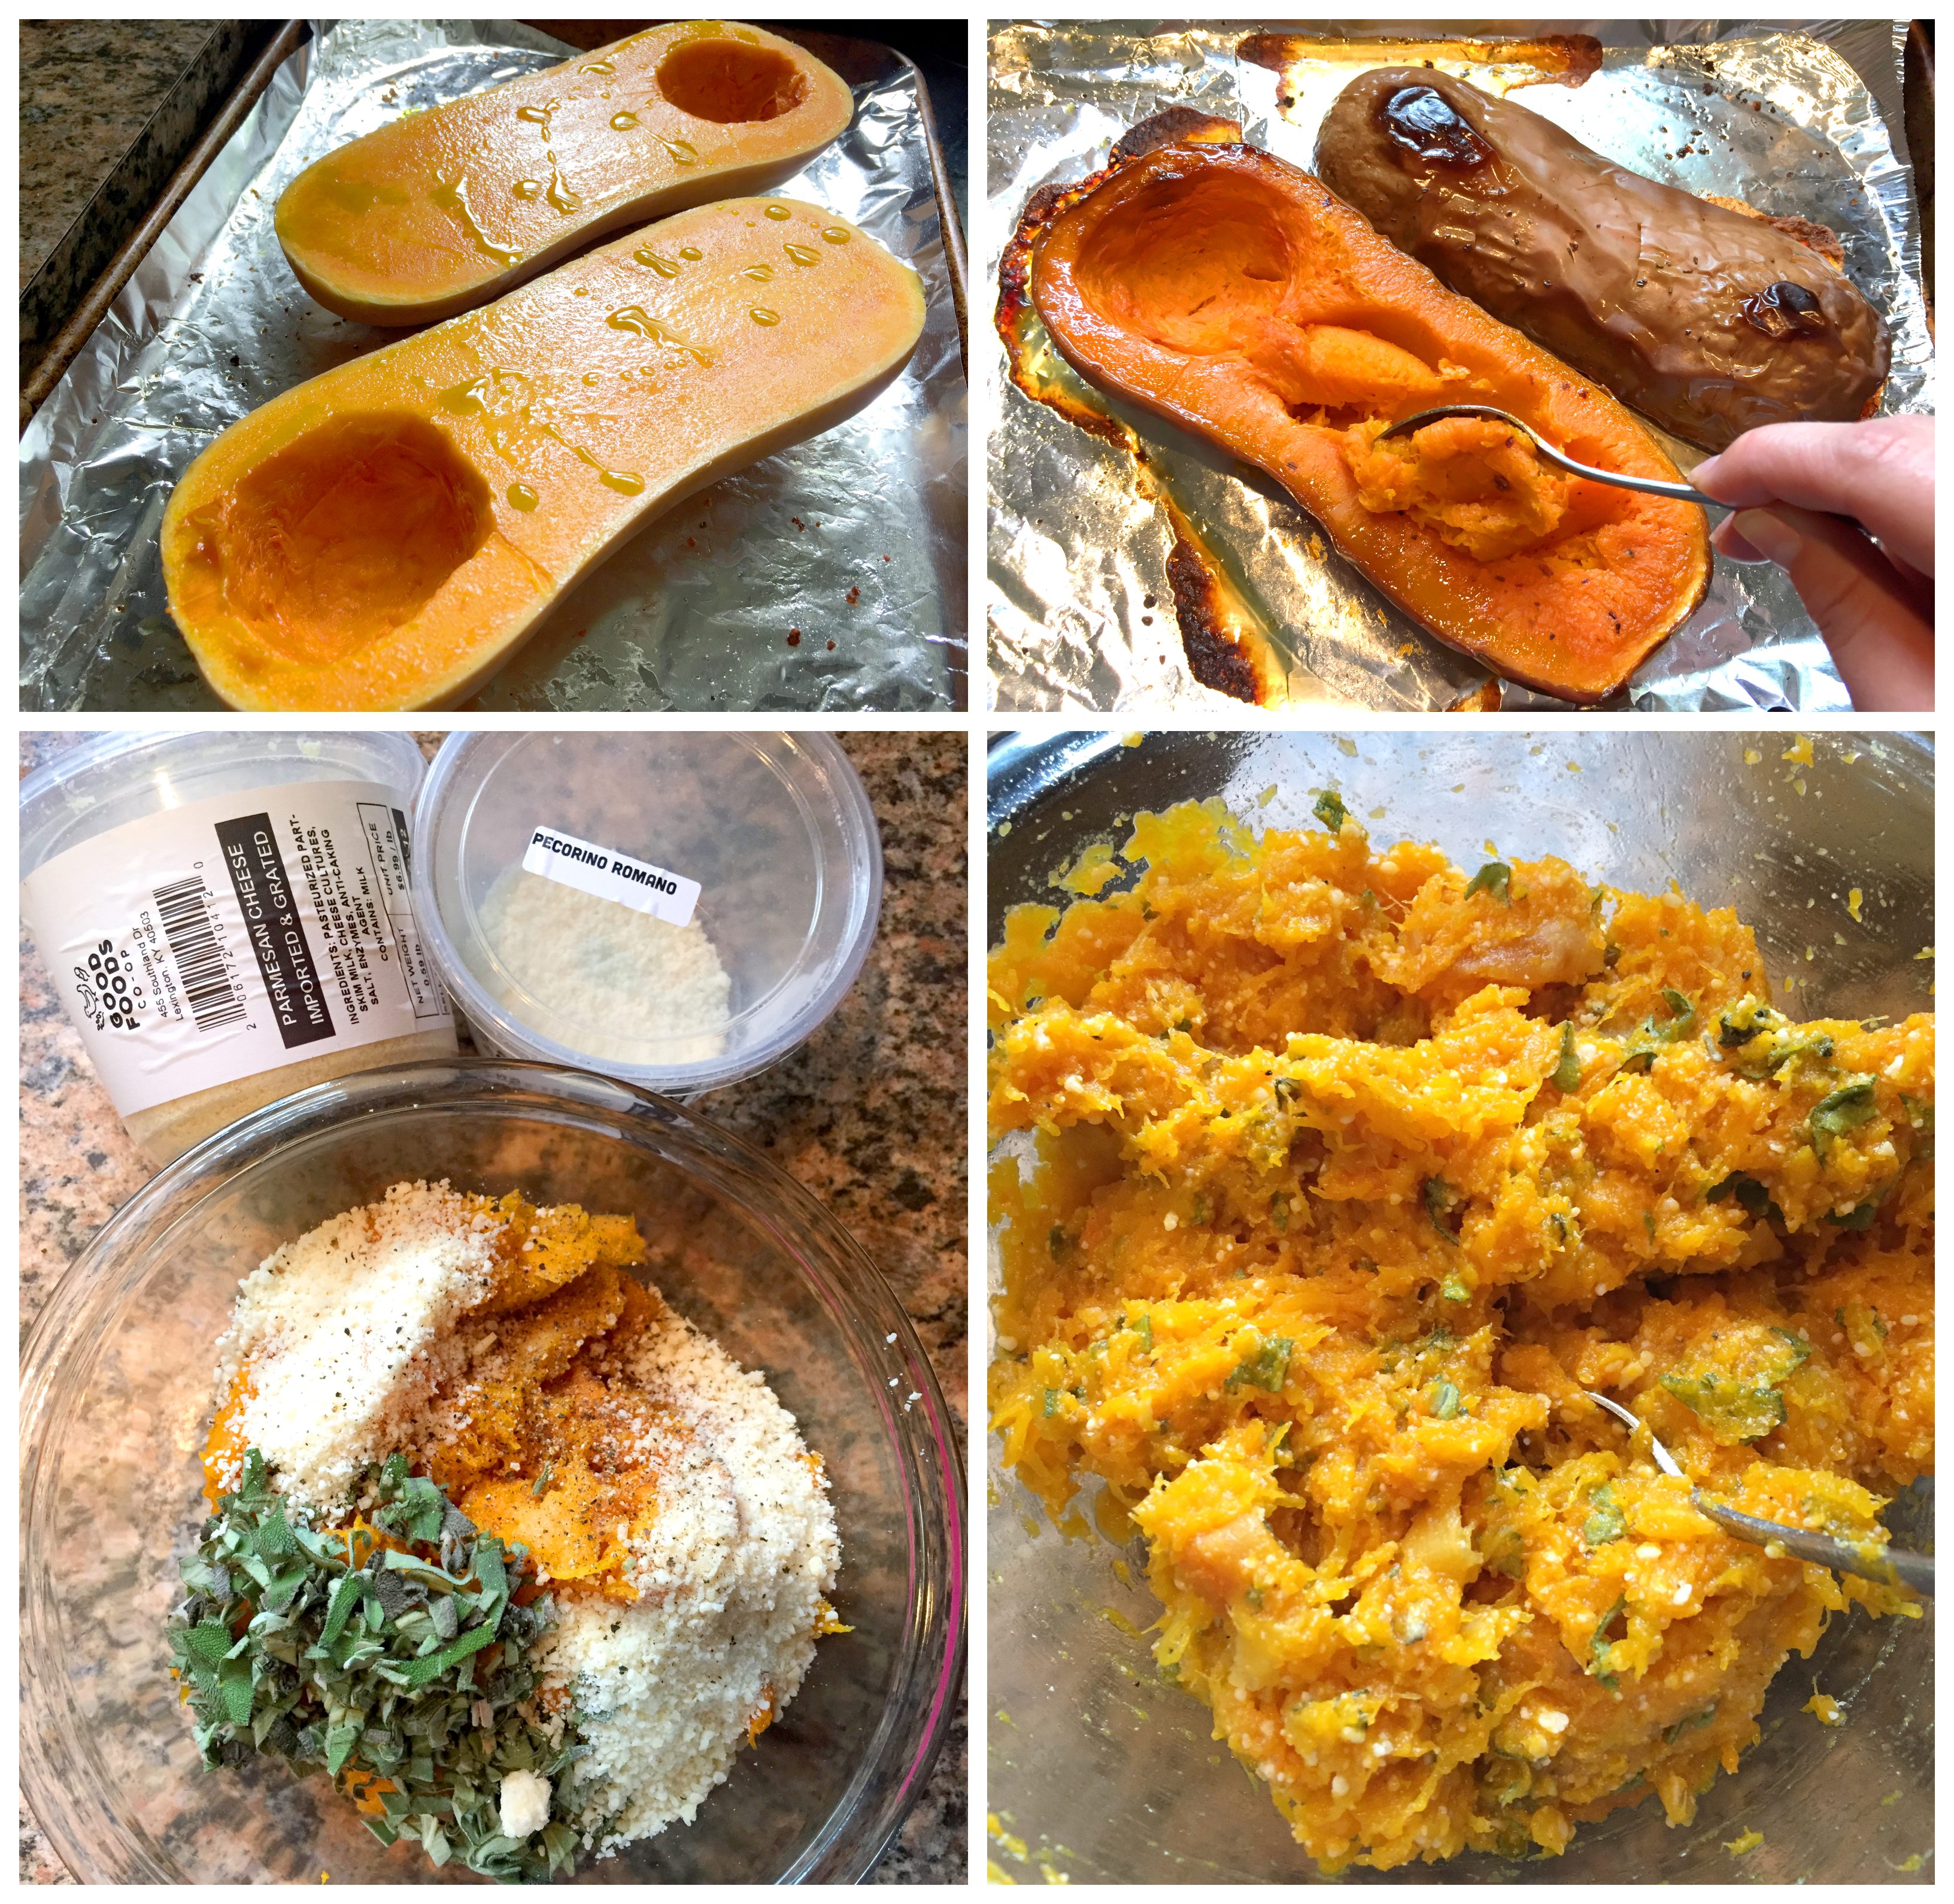
The recipe I was following offered a variety of filling suggestions, and I decided the butternut squash and sage option sounded warming and delicious to me (plus the weather was feeling more like fall than spring outside). I roasted the squash with a little oil and salt, let it cool, then scooped out the flesh and mixed it with chopped sage, pepper, Pecorino Romano and Parmigiano Reggiano.
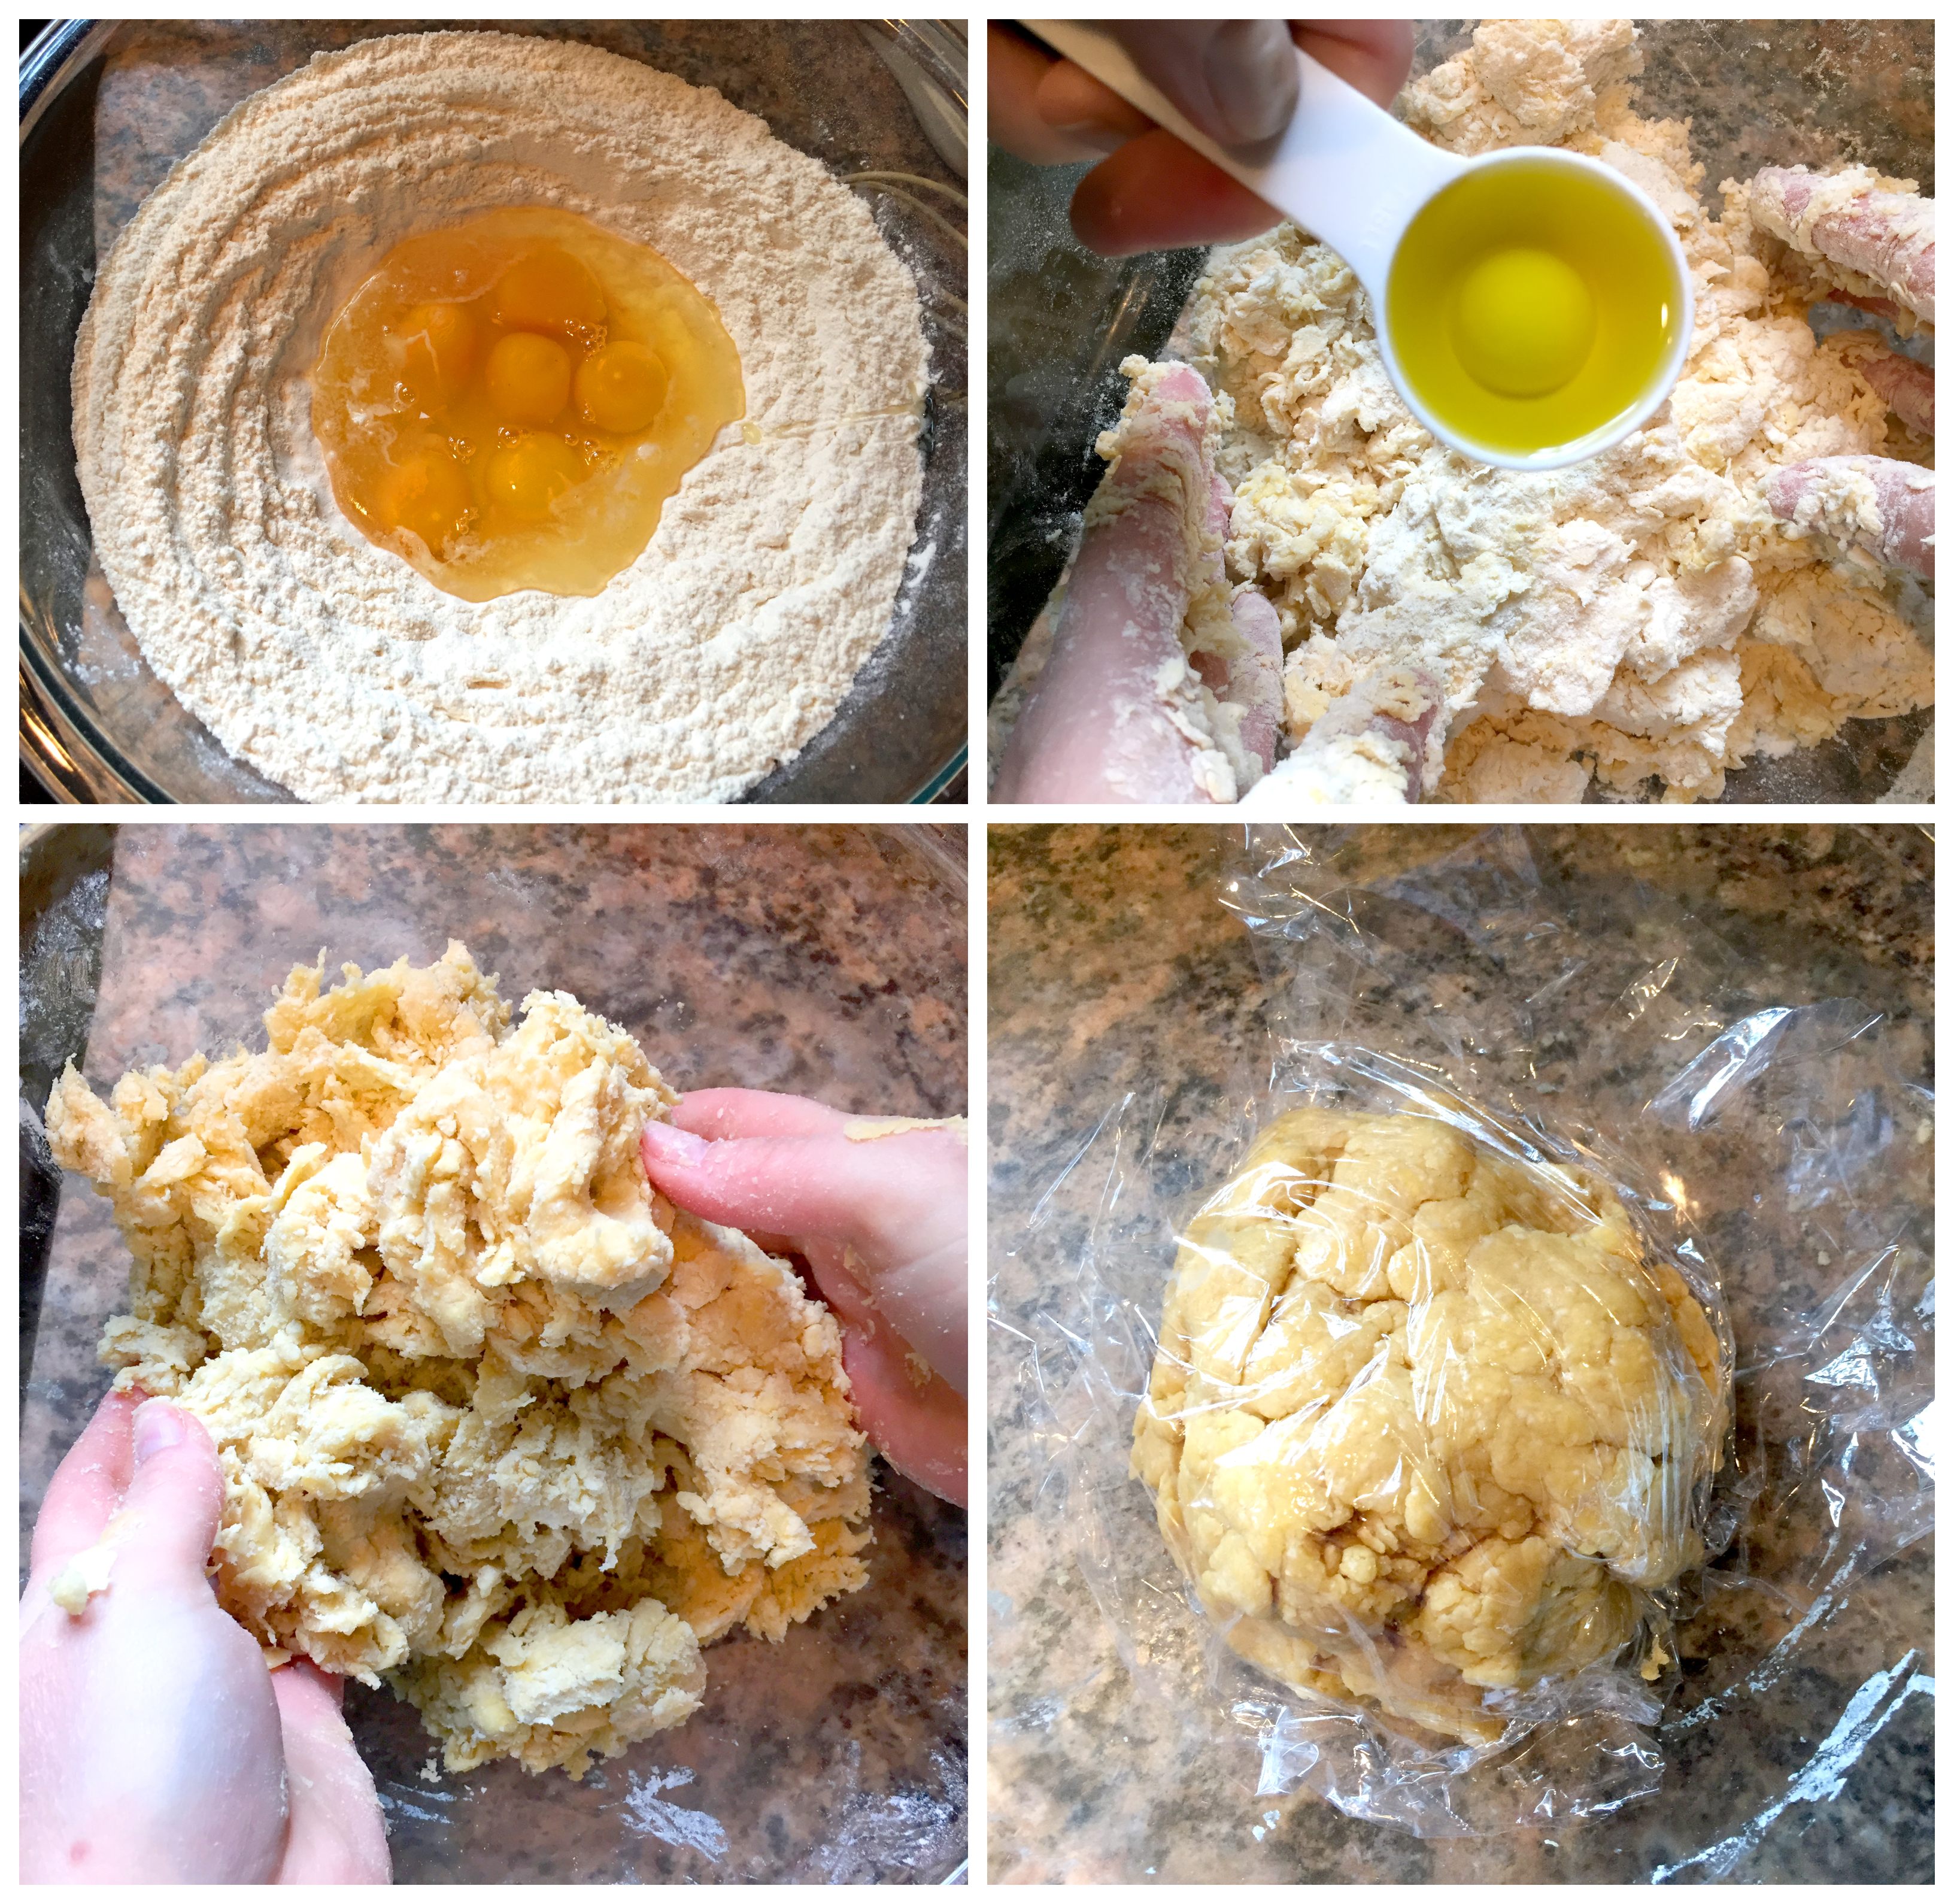
With the filling ready to go, I started on the dough by whisking together flour and salt, then adding eggs and then olive oil (it’s handy to have a helper available to add the oil once you’ve already gotten your hands in the dough). I decided to double the recipe I was following because I figured “in for a penny, in for a pound”, right? I also wanted some leftovers because the recipe mentioned the uncooked ravioli could be frozen.
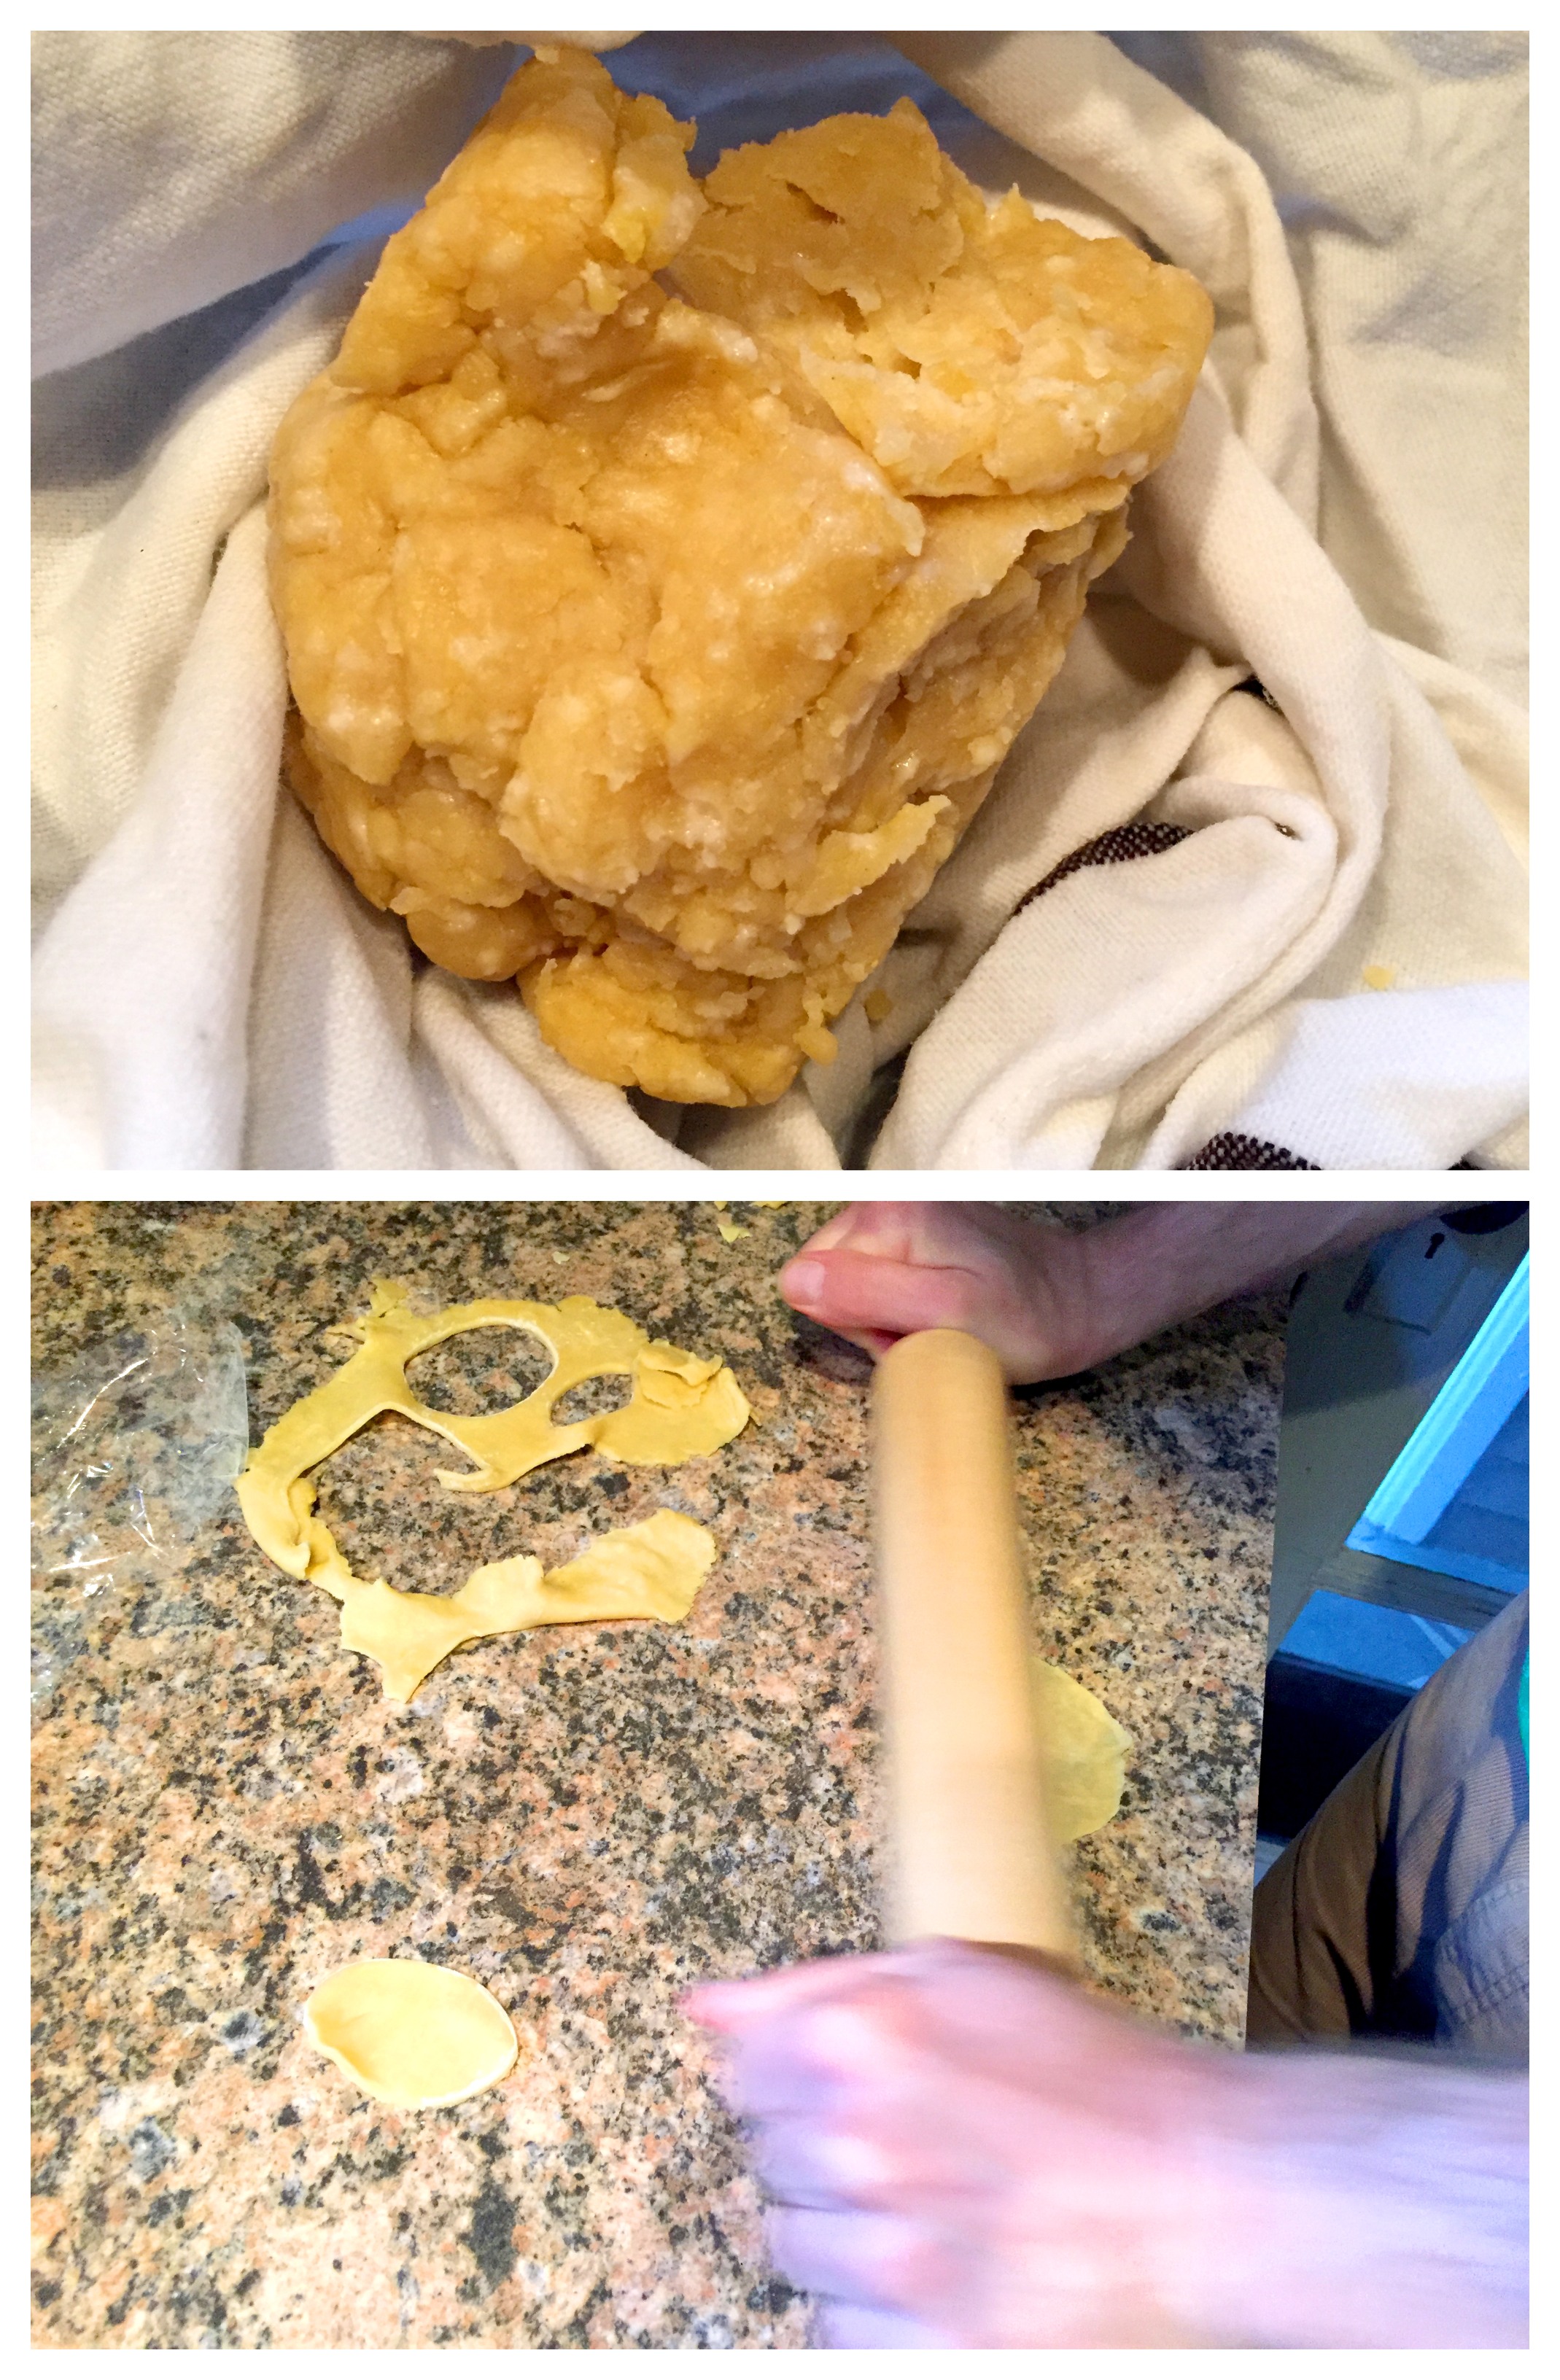
Working the dough for 5 minutes, I sometimes wondered if it would ever incorporate. It was a thick, dry, crumbly dough at first, but patience does pay off. It eventually came together, though I would never say it was overly moist. It had just enough moisture to form into a cohesive ball, but it was a bit of an arm workout to get it there. I tucked some plastic wrap around my dough ball and let it rest for half an hour.
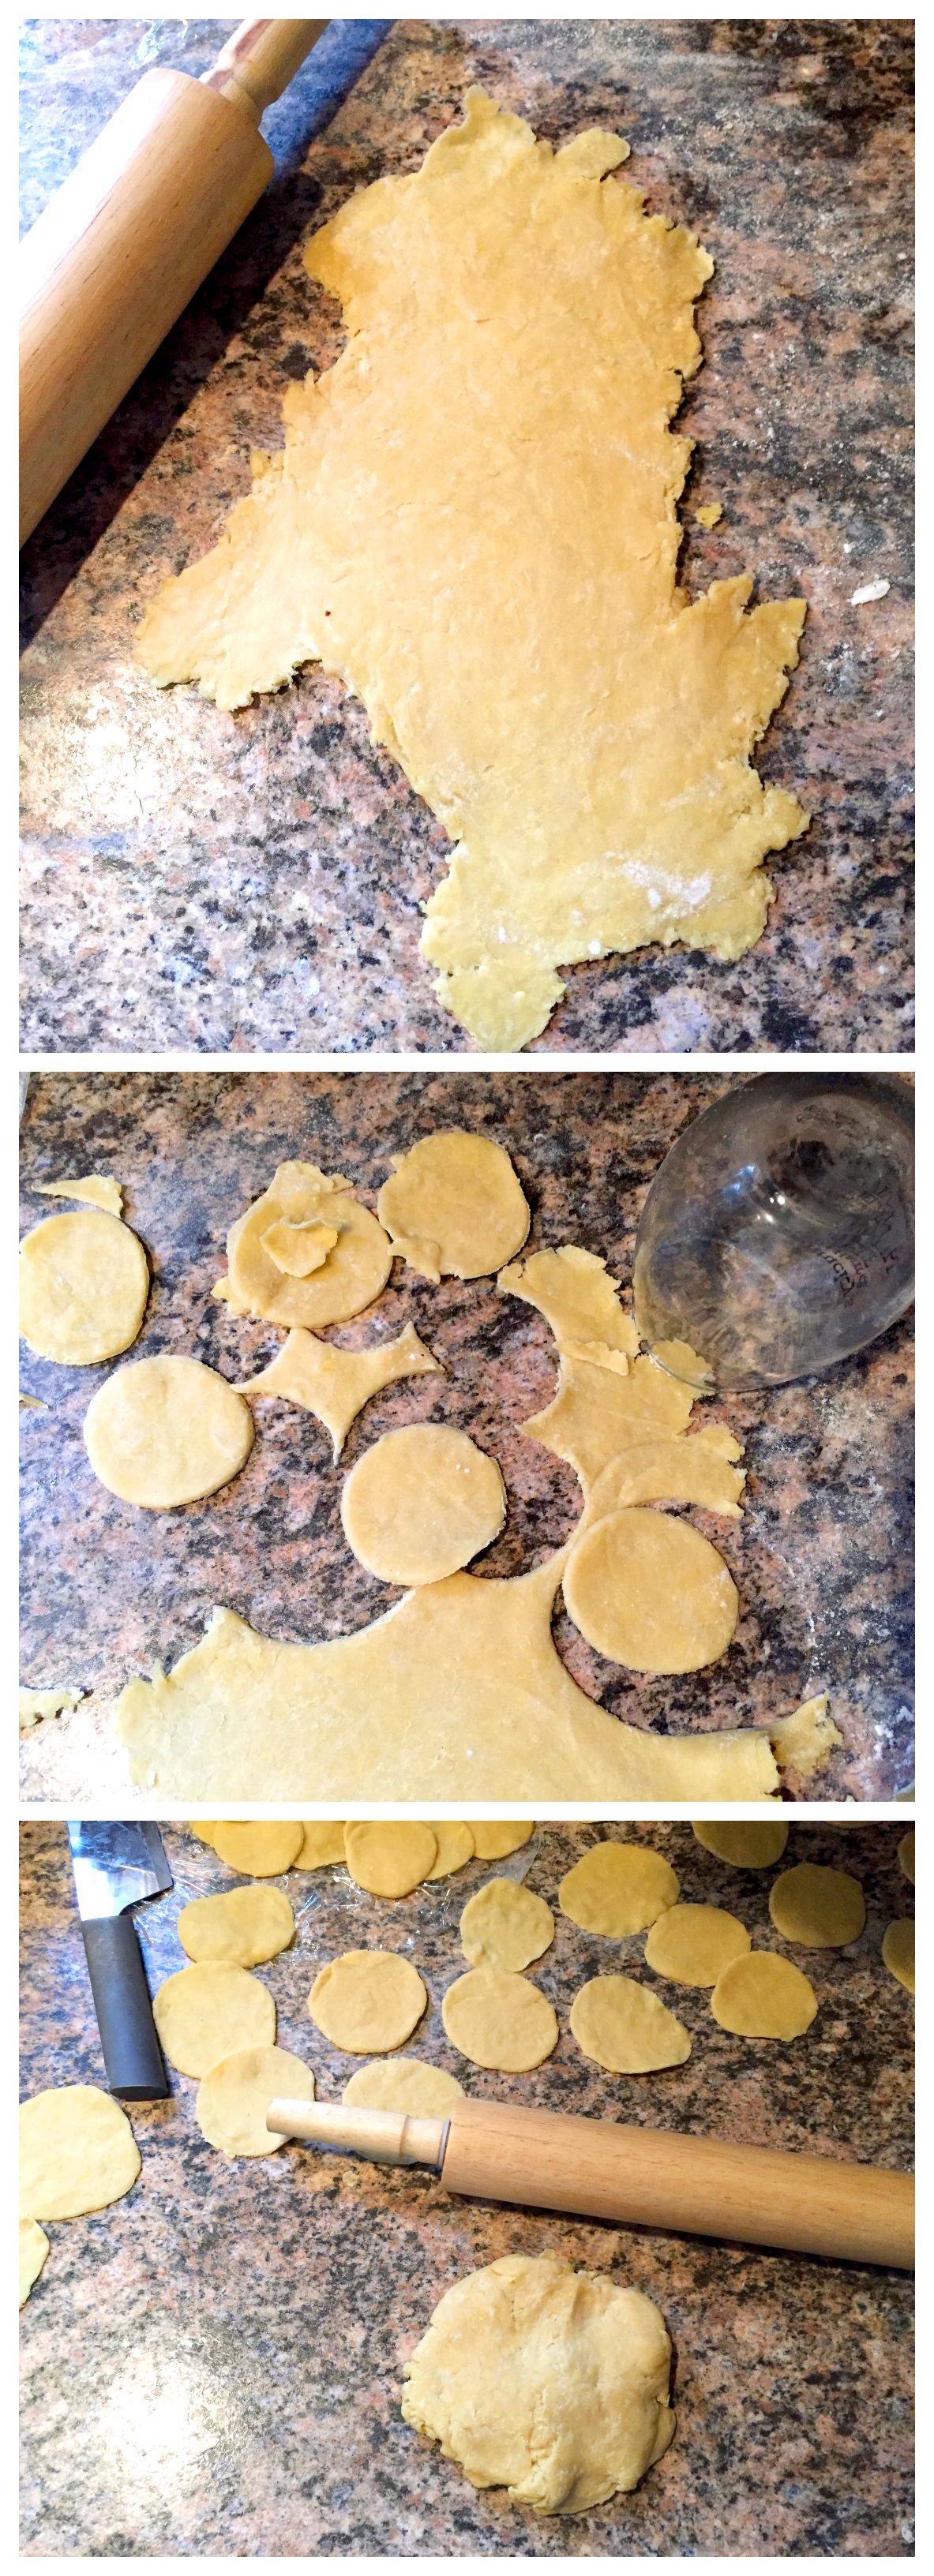
Once it was rested, I got to work rolling it out and cutting out my disks. This is the hardest part of the whole ordeal. This dough is THICK and springy. I learned to work with small amounts of it at a time, and since I was rolling by hand with a rolling pin, I found it easier to get the dough to about a quarter-inch thickness, then cut out my disk, then roll that disc again to the desired flatness. Rolling the sheets of dough was very difficult and quite a workout.
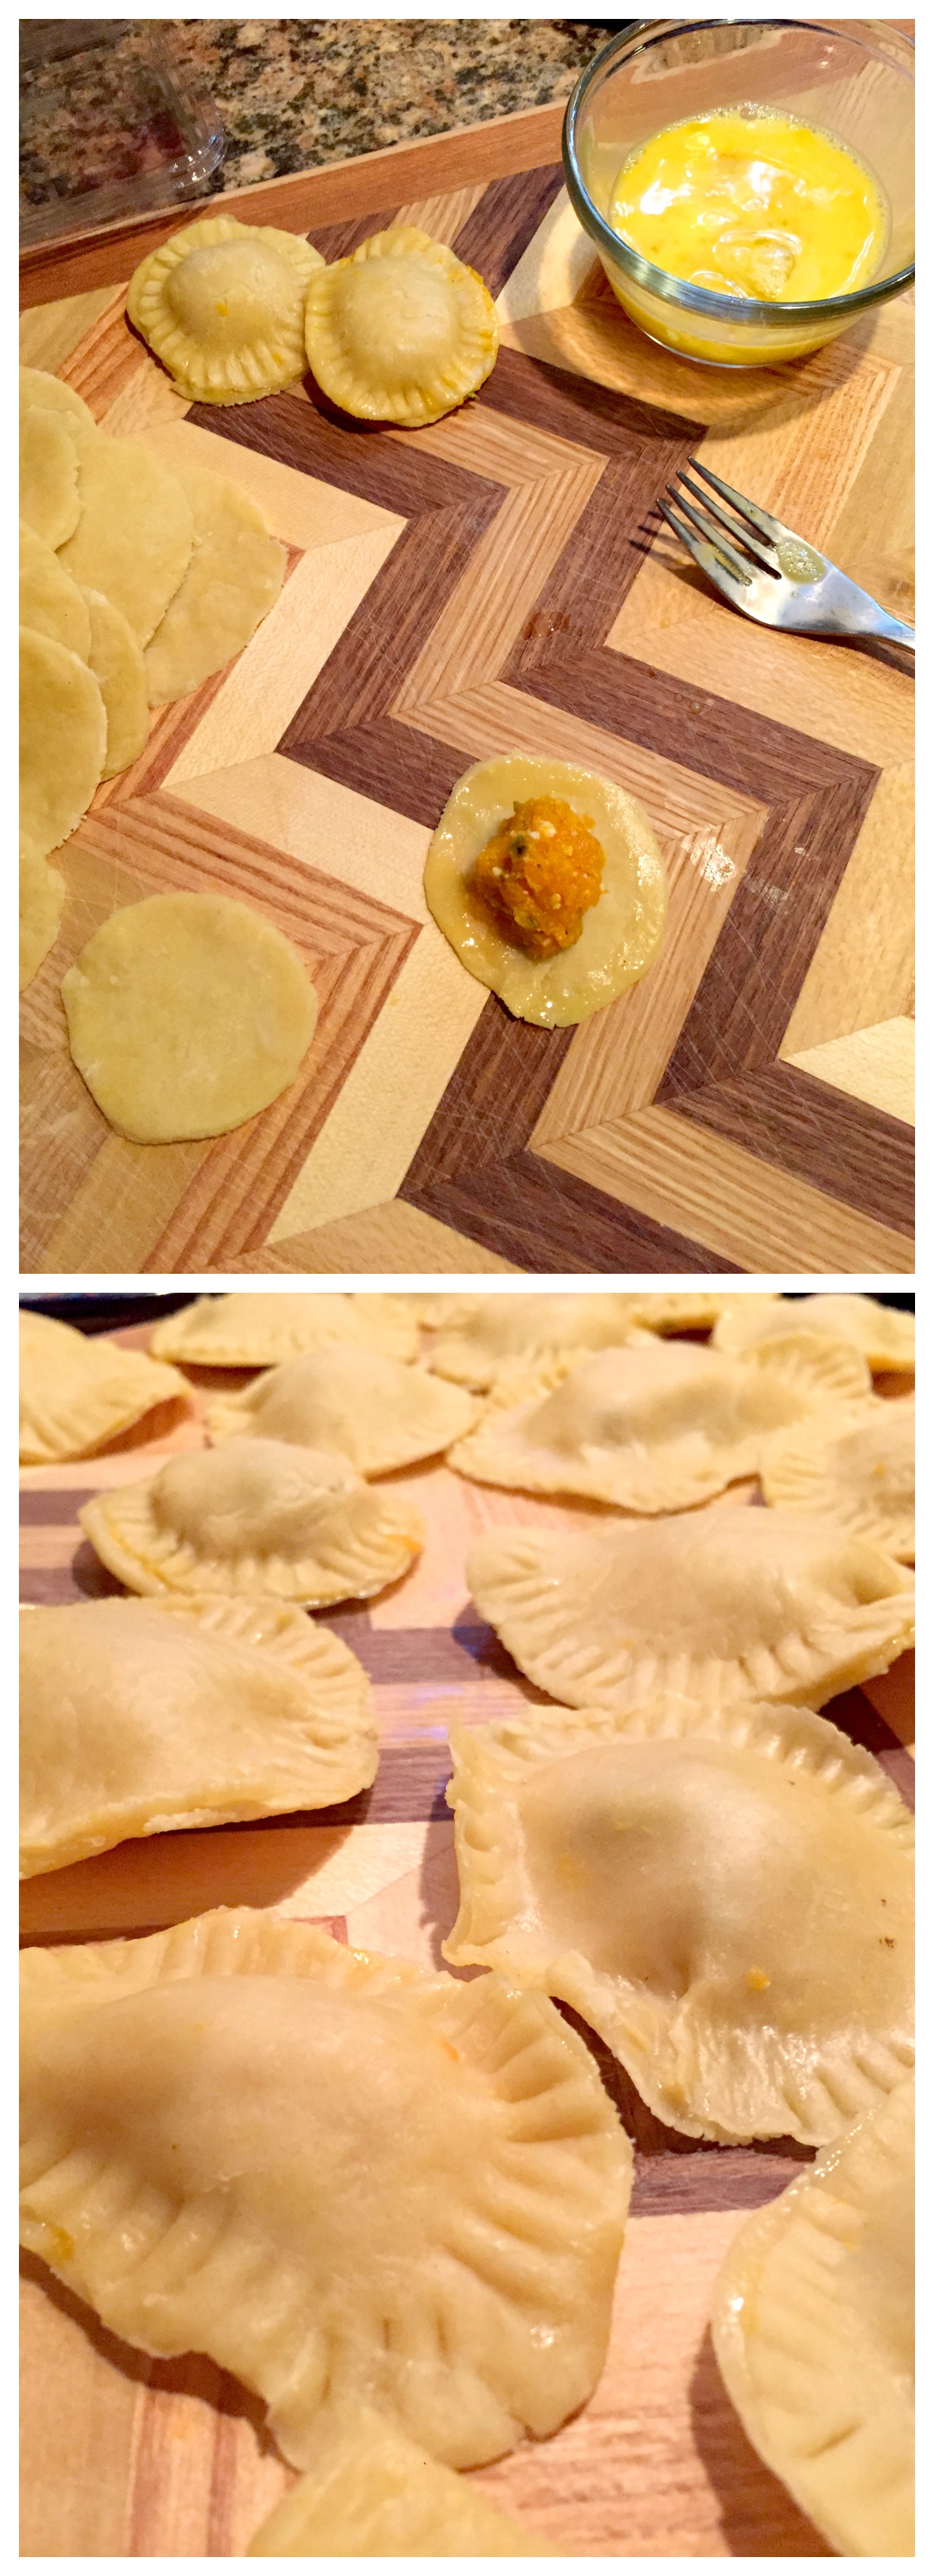
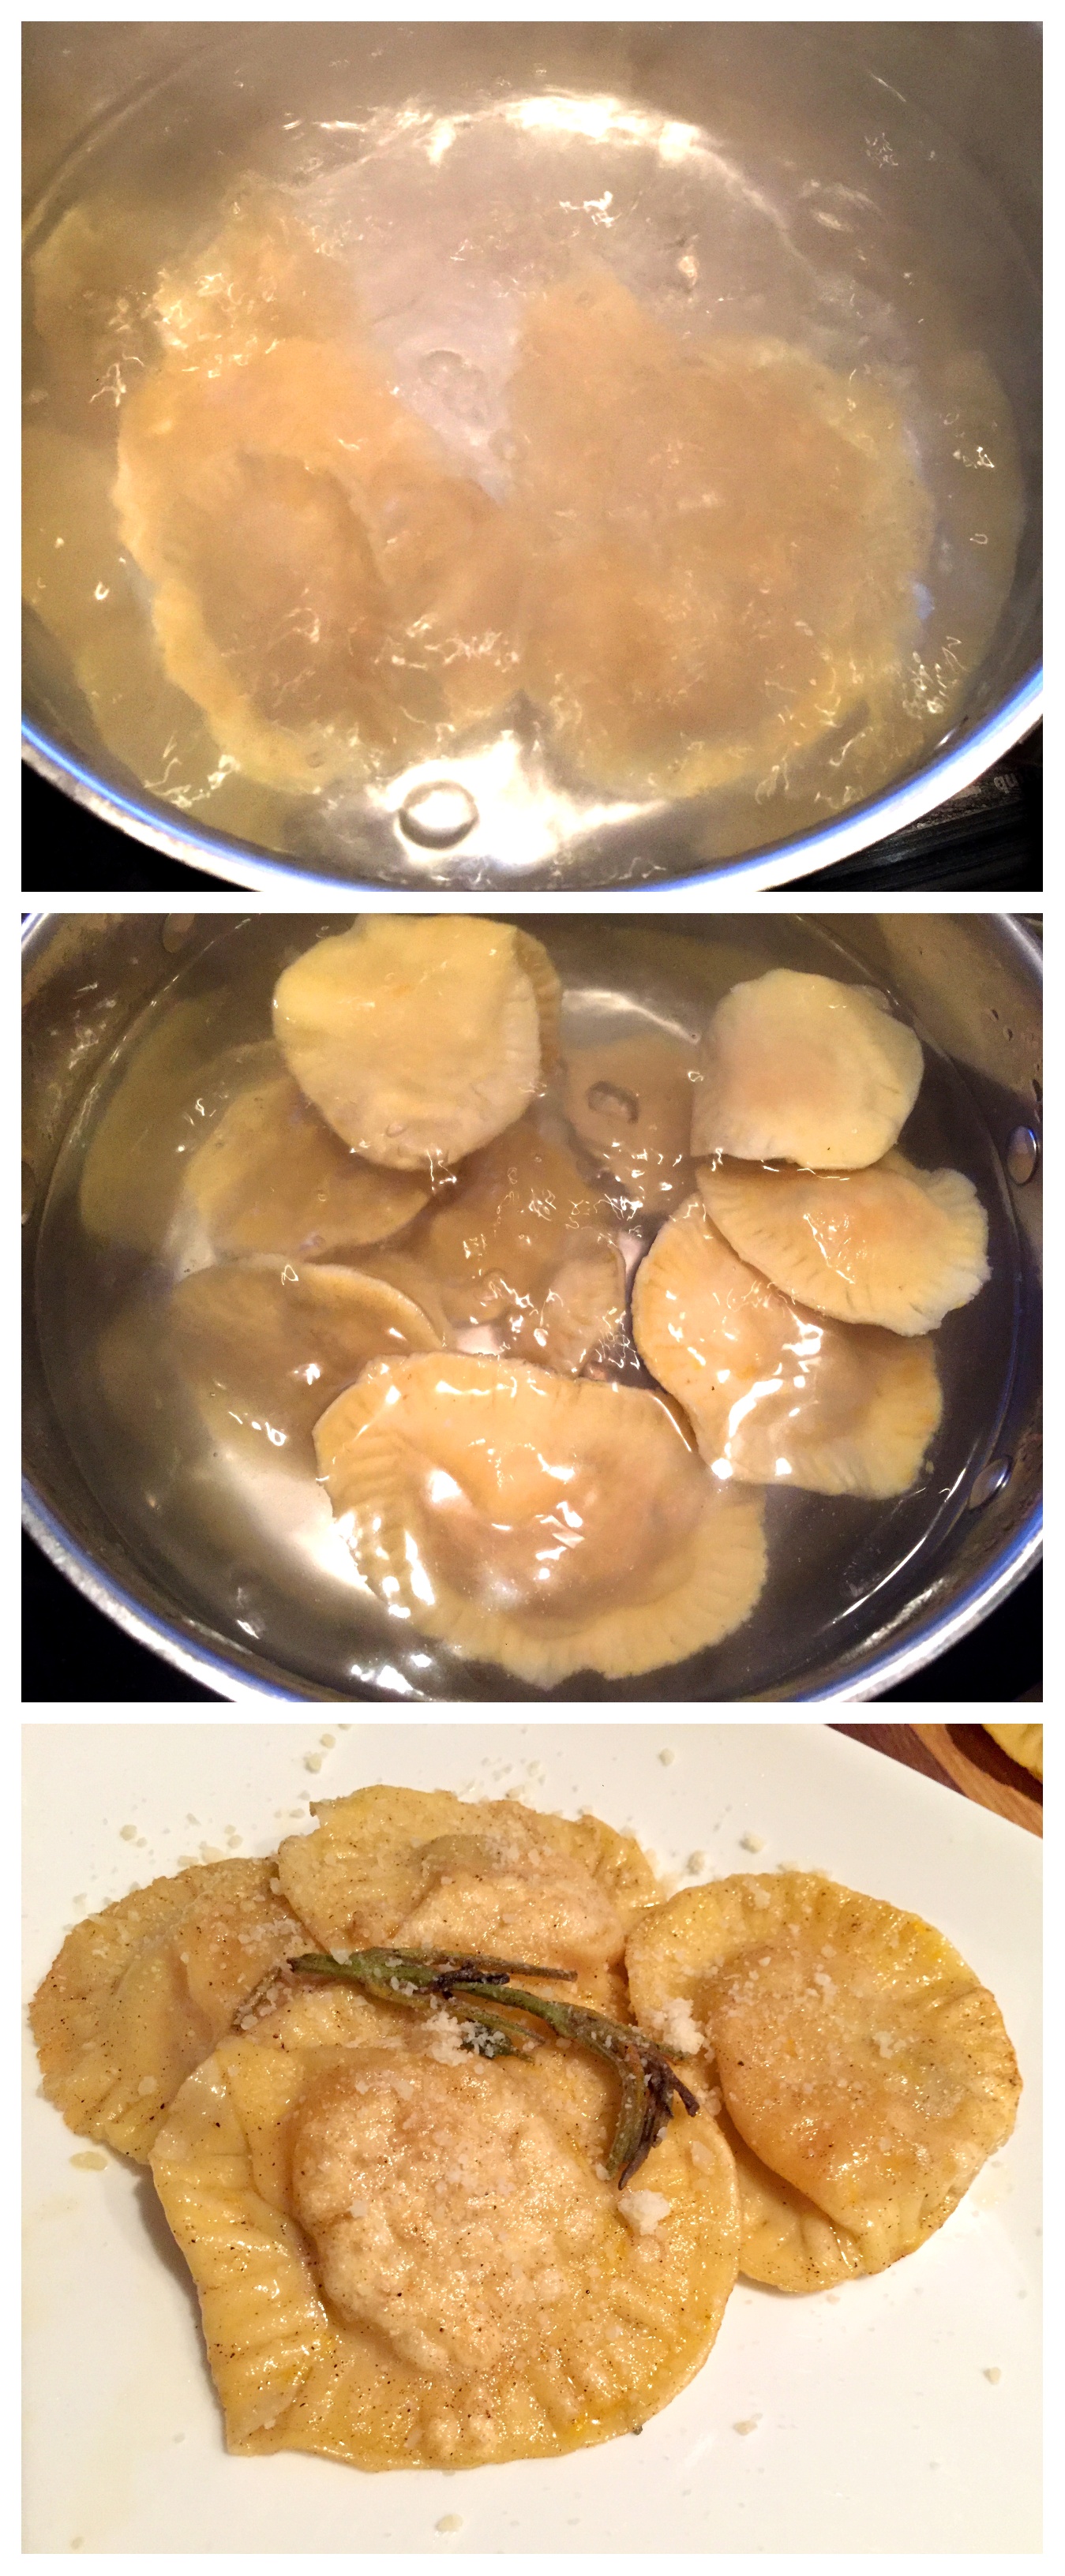
I eventually had to call in reinforcements (my husband) to carry on the rolling out of the dough so my hands could get a bit of a rest while I started on filling the ravioli and crimping the edges together with eggwash and the help of a fork. Some of the ravioli discs ended up being quite large after their final rolling out, so I formed a few of them as mezzaluna (half-moon) shapes. Hey, we’re going for “rustic” here, right? It took a bit of practice to figure out how much filling each ravioli could really handle, but I got the hang of it pretty quickly.
Once all the ravioli were formed (finally! only took a couple hours), I brought a large pot of salted water to a boil and tossed them in, about 6 at a time, until we had enough for our dinner. The ravioli sank when first added to the pot, then floated to the top to show they were done. Once they were cooked, I scooped them out and added them to a large pan where I had some browned butter and sage ready on medium heat. I toasted the ravioli lightly in the butter before plating and sprinkling them with Parmigiano Reggiano. I then devoured them – they were light and flavorful!
What I Learned
This is a LOT of work to do by hand. I now officially have a pasta roller/machine added to my wish list. It’s a good workout, especially if you double the recipe. So…
Unless you have multiple people to share the effort of rolling out all this dough, do NOT double the recipe. I made a noble effort but called in my husband about two-thirds of the way through my dough (see how speedy he was working in the photo below? We were very hungry at this point).
Keep your dough moist. While rolling out the rest of your dough, I recommend keeping a damp towel over the dough in the proverbial bullpen. It will make the remaining dough SO MUCH easier to roll out. This stuff gets dry fast, and the drier it is, the stiffer it gets.
Work in small amounts. It’s much easier to roll a thin strip than a massive sheet of dough.
Was it Worth all the Effort?
In short, yes! I learned a lot of lessons for next time, and once I do get that pasta roller/cutter, I fully plan on making ravioli at home again, and plenty of other fresh kinds of pasta too. The flavor was really nice, and the texture of the finished product was delightful. I fully plan to experiment with this more, but probably will wait until I have plenty of time on a weekend, not just a couple hours before dinner.
If you want fresh pasta but don’t feel like going to all the trouble, Lexington Pasta keeps your Co-op stocked with a variety of fresh pastas and sauces that create a delicious meal in minutes! You can find them in our Grab & Go cooler.