During quarantine, the Pinterest god/goddess within all of us seemed to emerge out of the woodwork. I was surprised to see the number of people making sourdough starters and just baking in general, not to mention the number of people who all of sudden were contractors, renovating their homes with the fervor of Chip and Joanna Gaines. My minimal-commitment version of all this DIY was natural tie-dye, more specifically dying some face masks with materials I already had on hand.
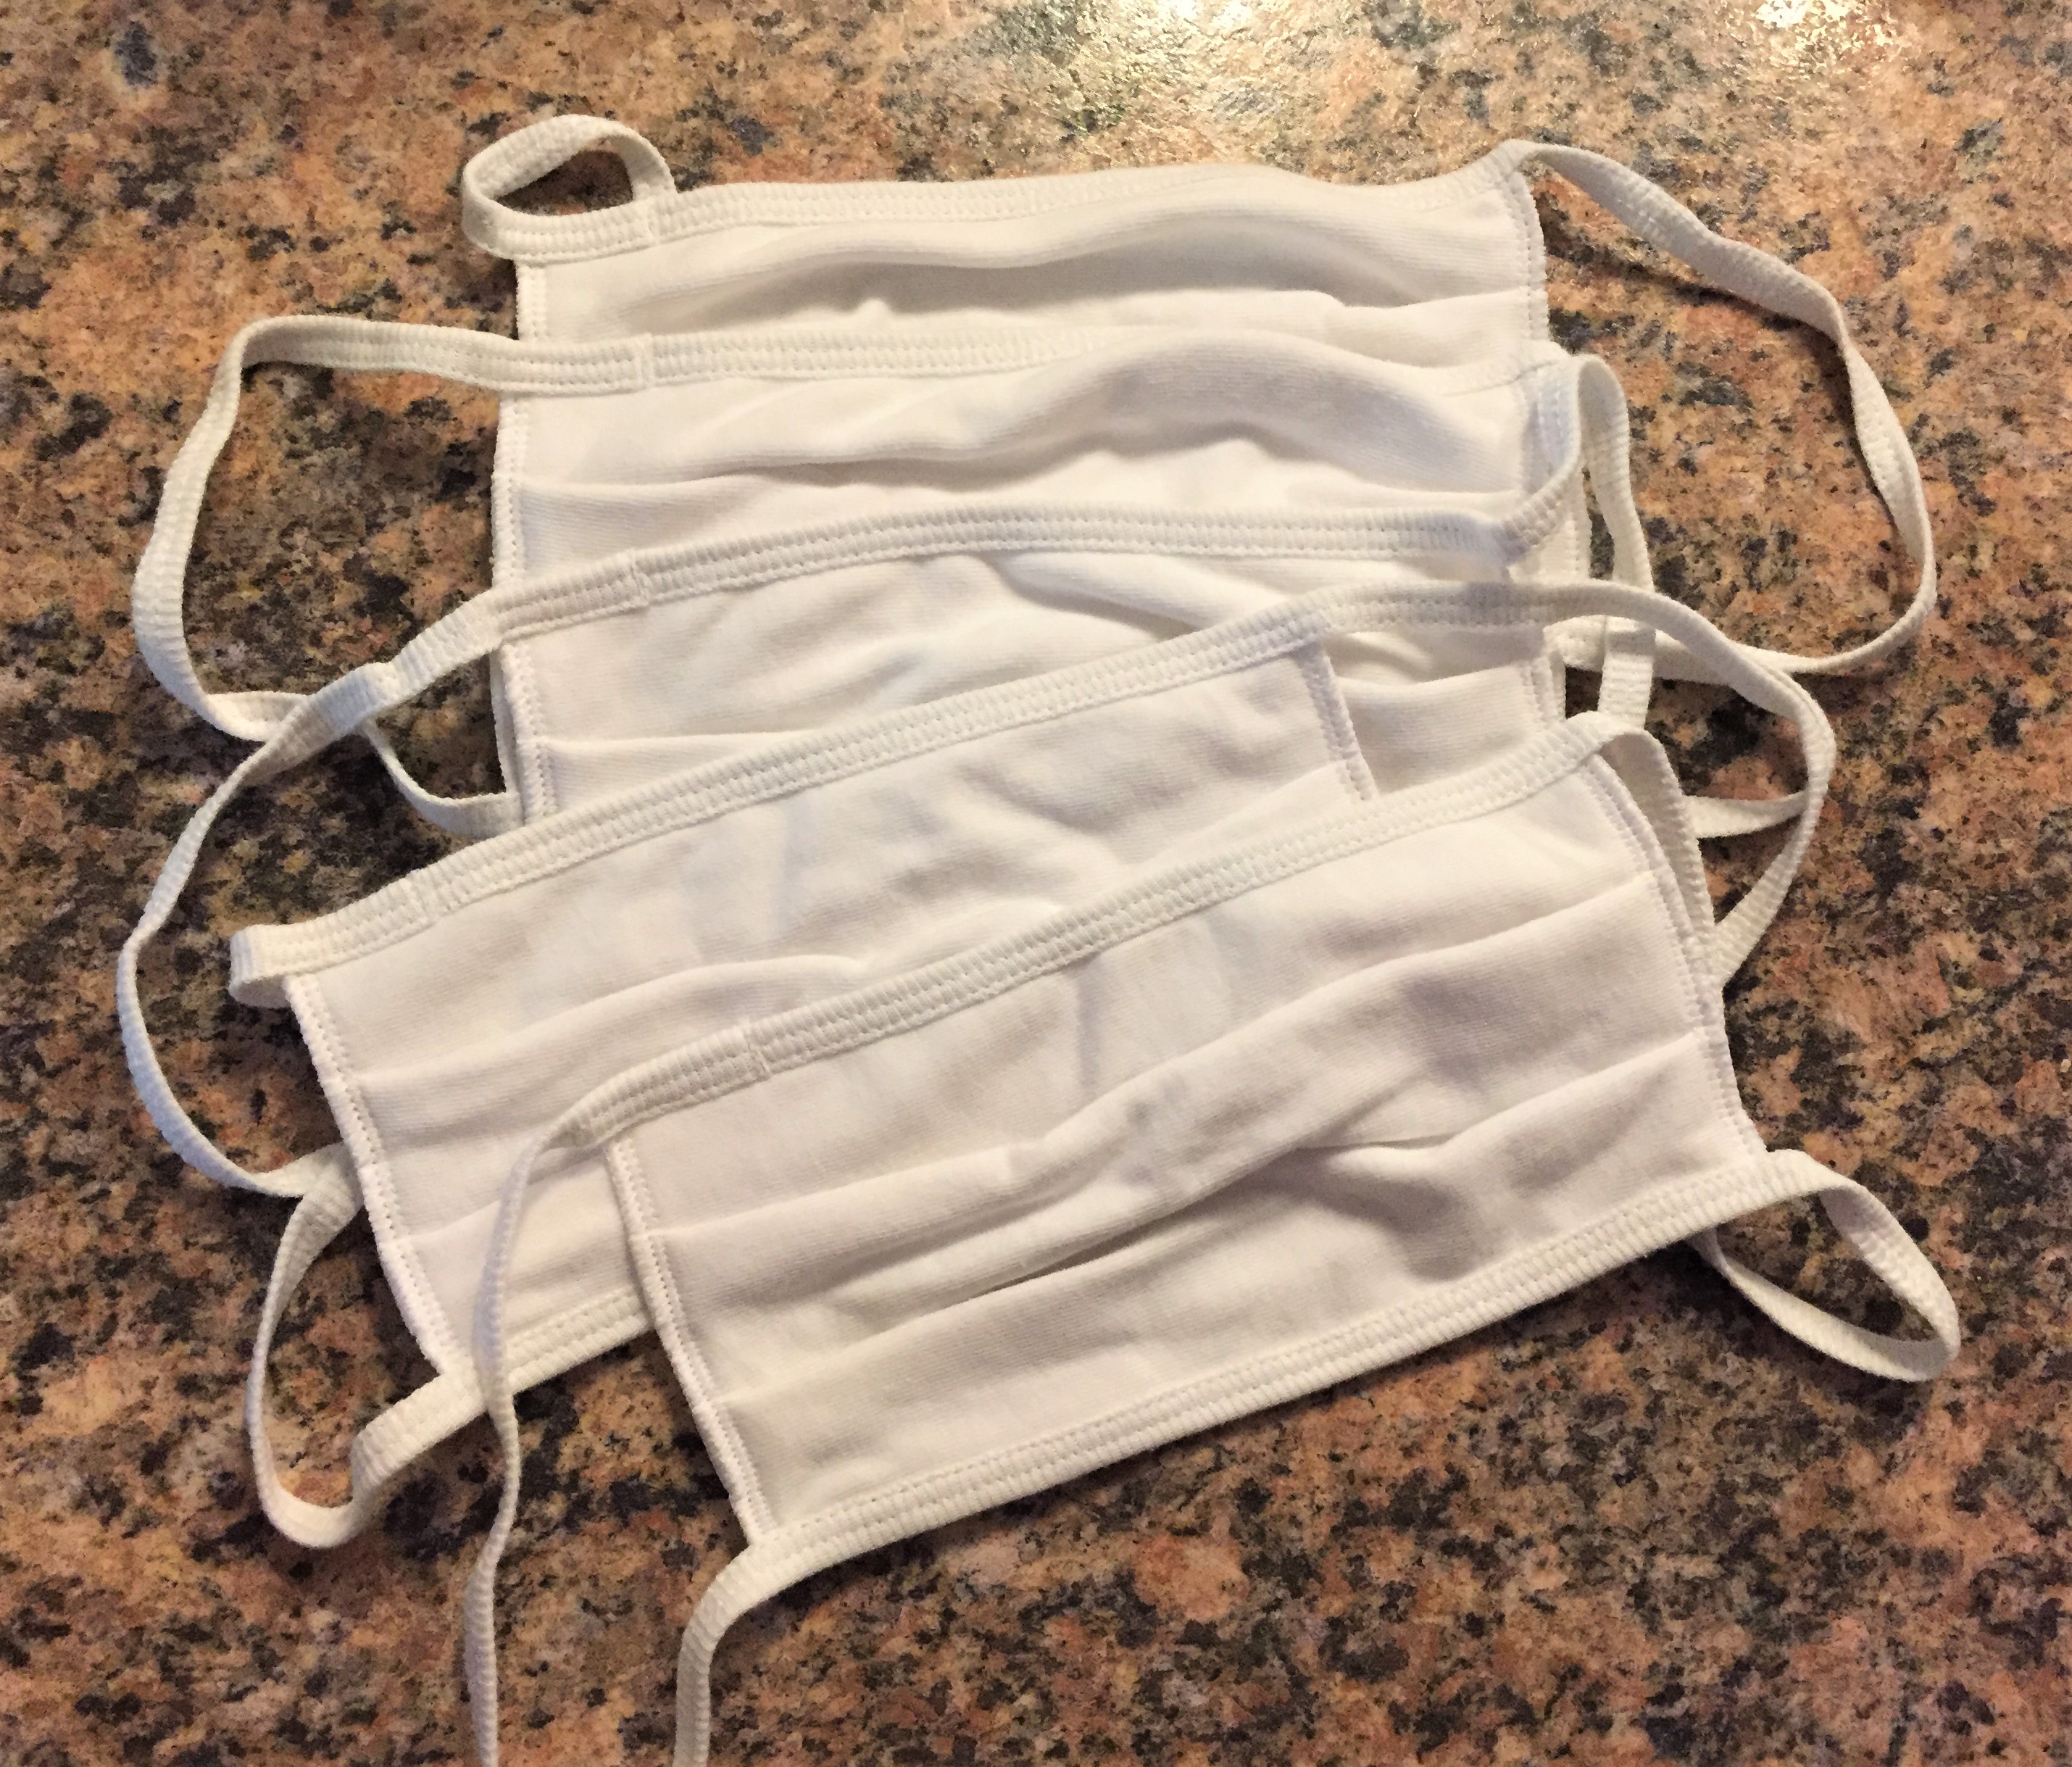
Luckily enough, our GM applied for some federal assistance programs as soon as COVID-19 hit, and thanks to this, we got a box full of face mask 5-packs to hand out to staff to help them stay safe at work. It was well-received, and I was especially excited to have a deeper bench of masks to use throughout the week so I didn’t need to wear a mask multiple days in a row, something the skin on my face was NOT happy about. On the flip side, and not to sound ungrateful for these very helpful masks, I was less than thrilled that their fabric and color reminded me of tighty whities, aka cotton briefs underwear. Not wanting to walk around with what felt like underwear on my face, I had to give them some flair!
I’d seen blogs about natural tie-dye using turmeric, red wine, onion skins and even plants. Armed with turmeric in my spice cabinet, rose petals from my backyard and a bottle of cheap red wine that I wanted an excuse to crack open, I found some vinegar and rubber bands and got to work.
Prepping your material for natural tie-dye
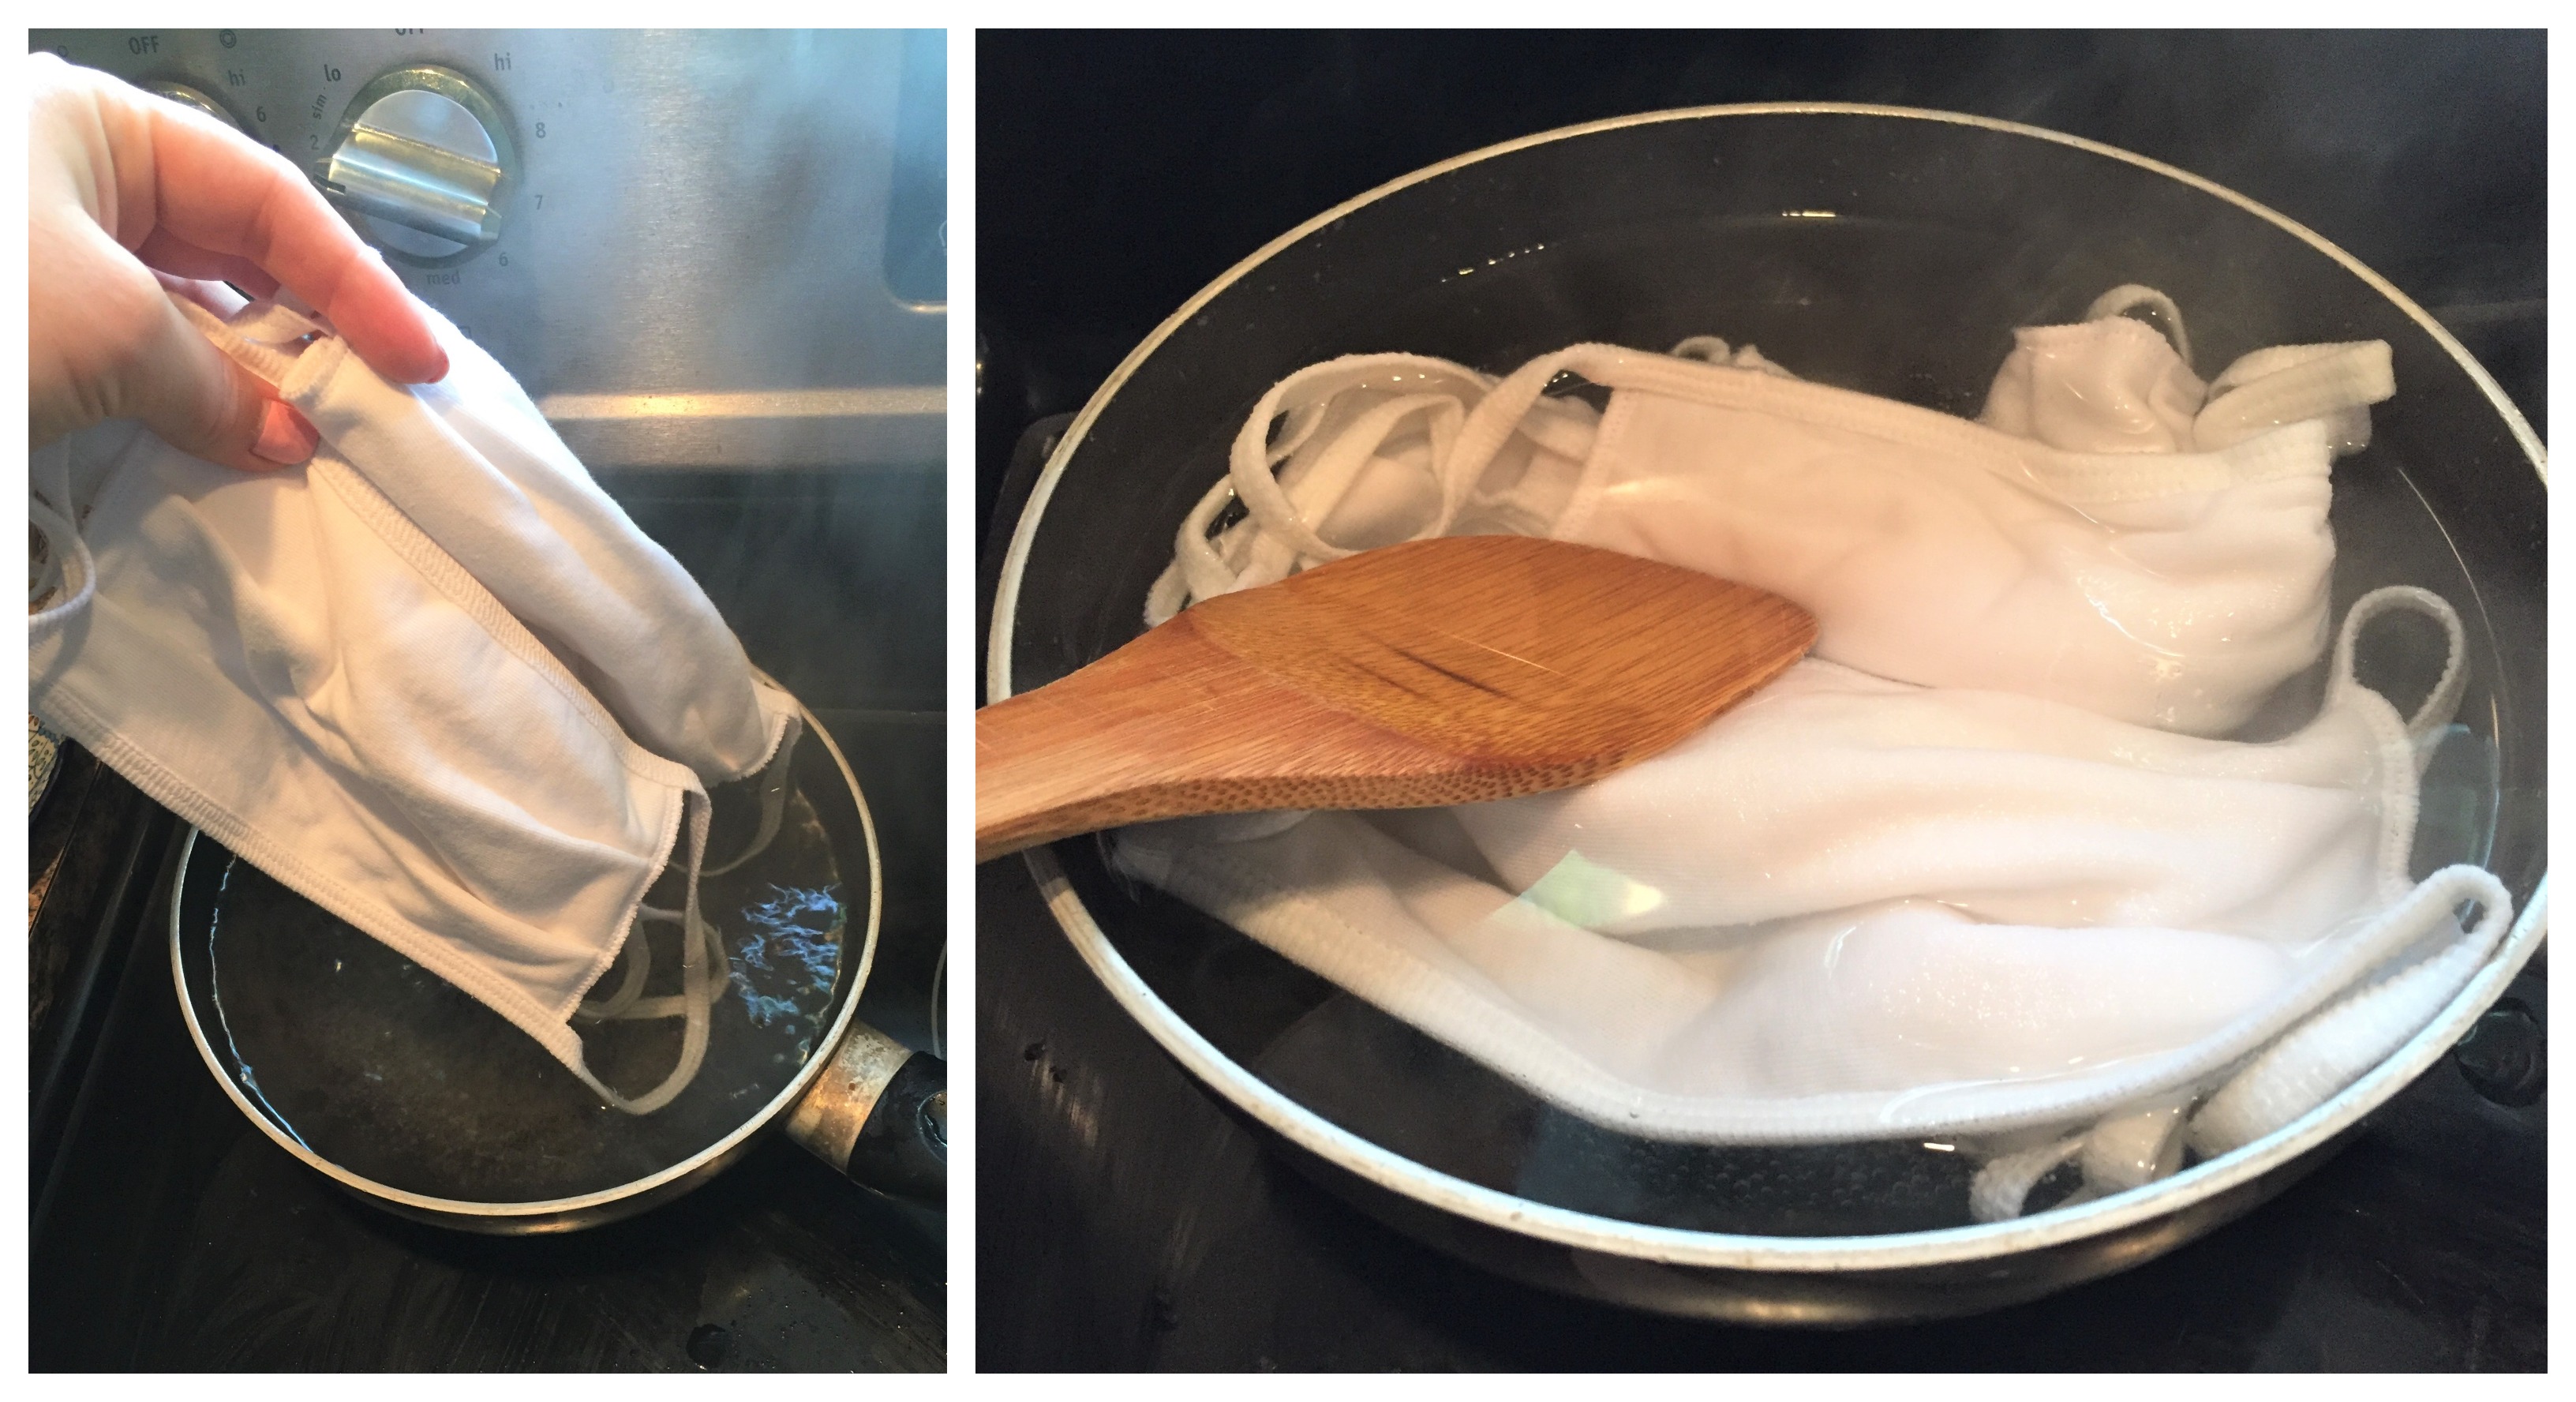
Natural materials are inherently less likely to stain a fabric to the same brightness and saturation levels as a chemical fabric dye, so right off the bat, I knew I’d be looking at some muted colors. I figured the yellow of turmeric would pair nicely with a light pink from my flower petals and a deep burgundy from the wine would add some dimension. But to get these less saturated colors to stick, you first need to prep your fabric by soaking it in some boiling vinegar.
I referenced this blog when figuring out the best mordant/fixative method for my natural tie-dye masks, and per its advice, simmered the masks for over an hour in the vinegar, checking on them regularly as they would sometimes bubble up above the surface, and pushing them down to resubmerge them. I then rinsed them and let them dry completely overnight before starting the dying process.
Creating your dye
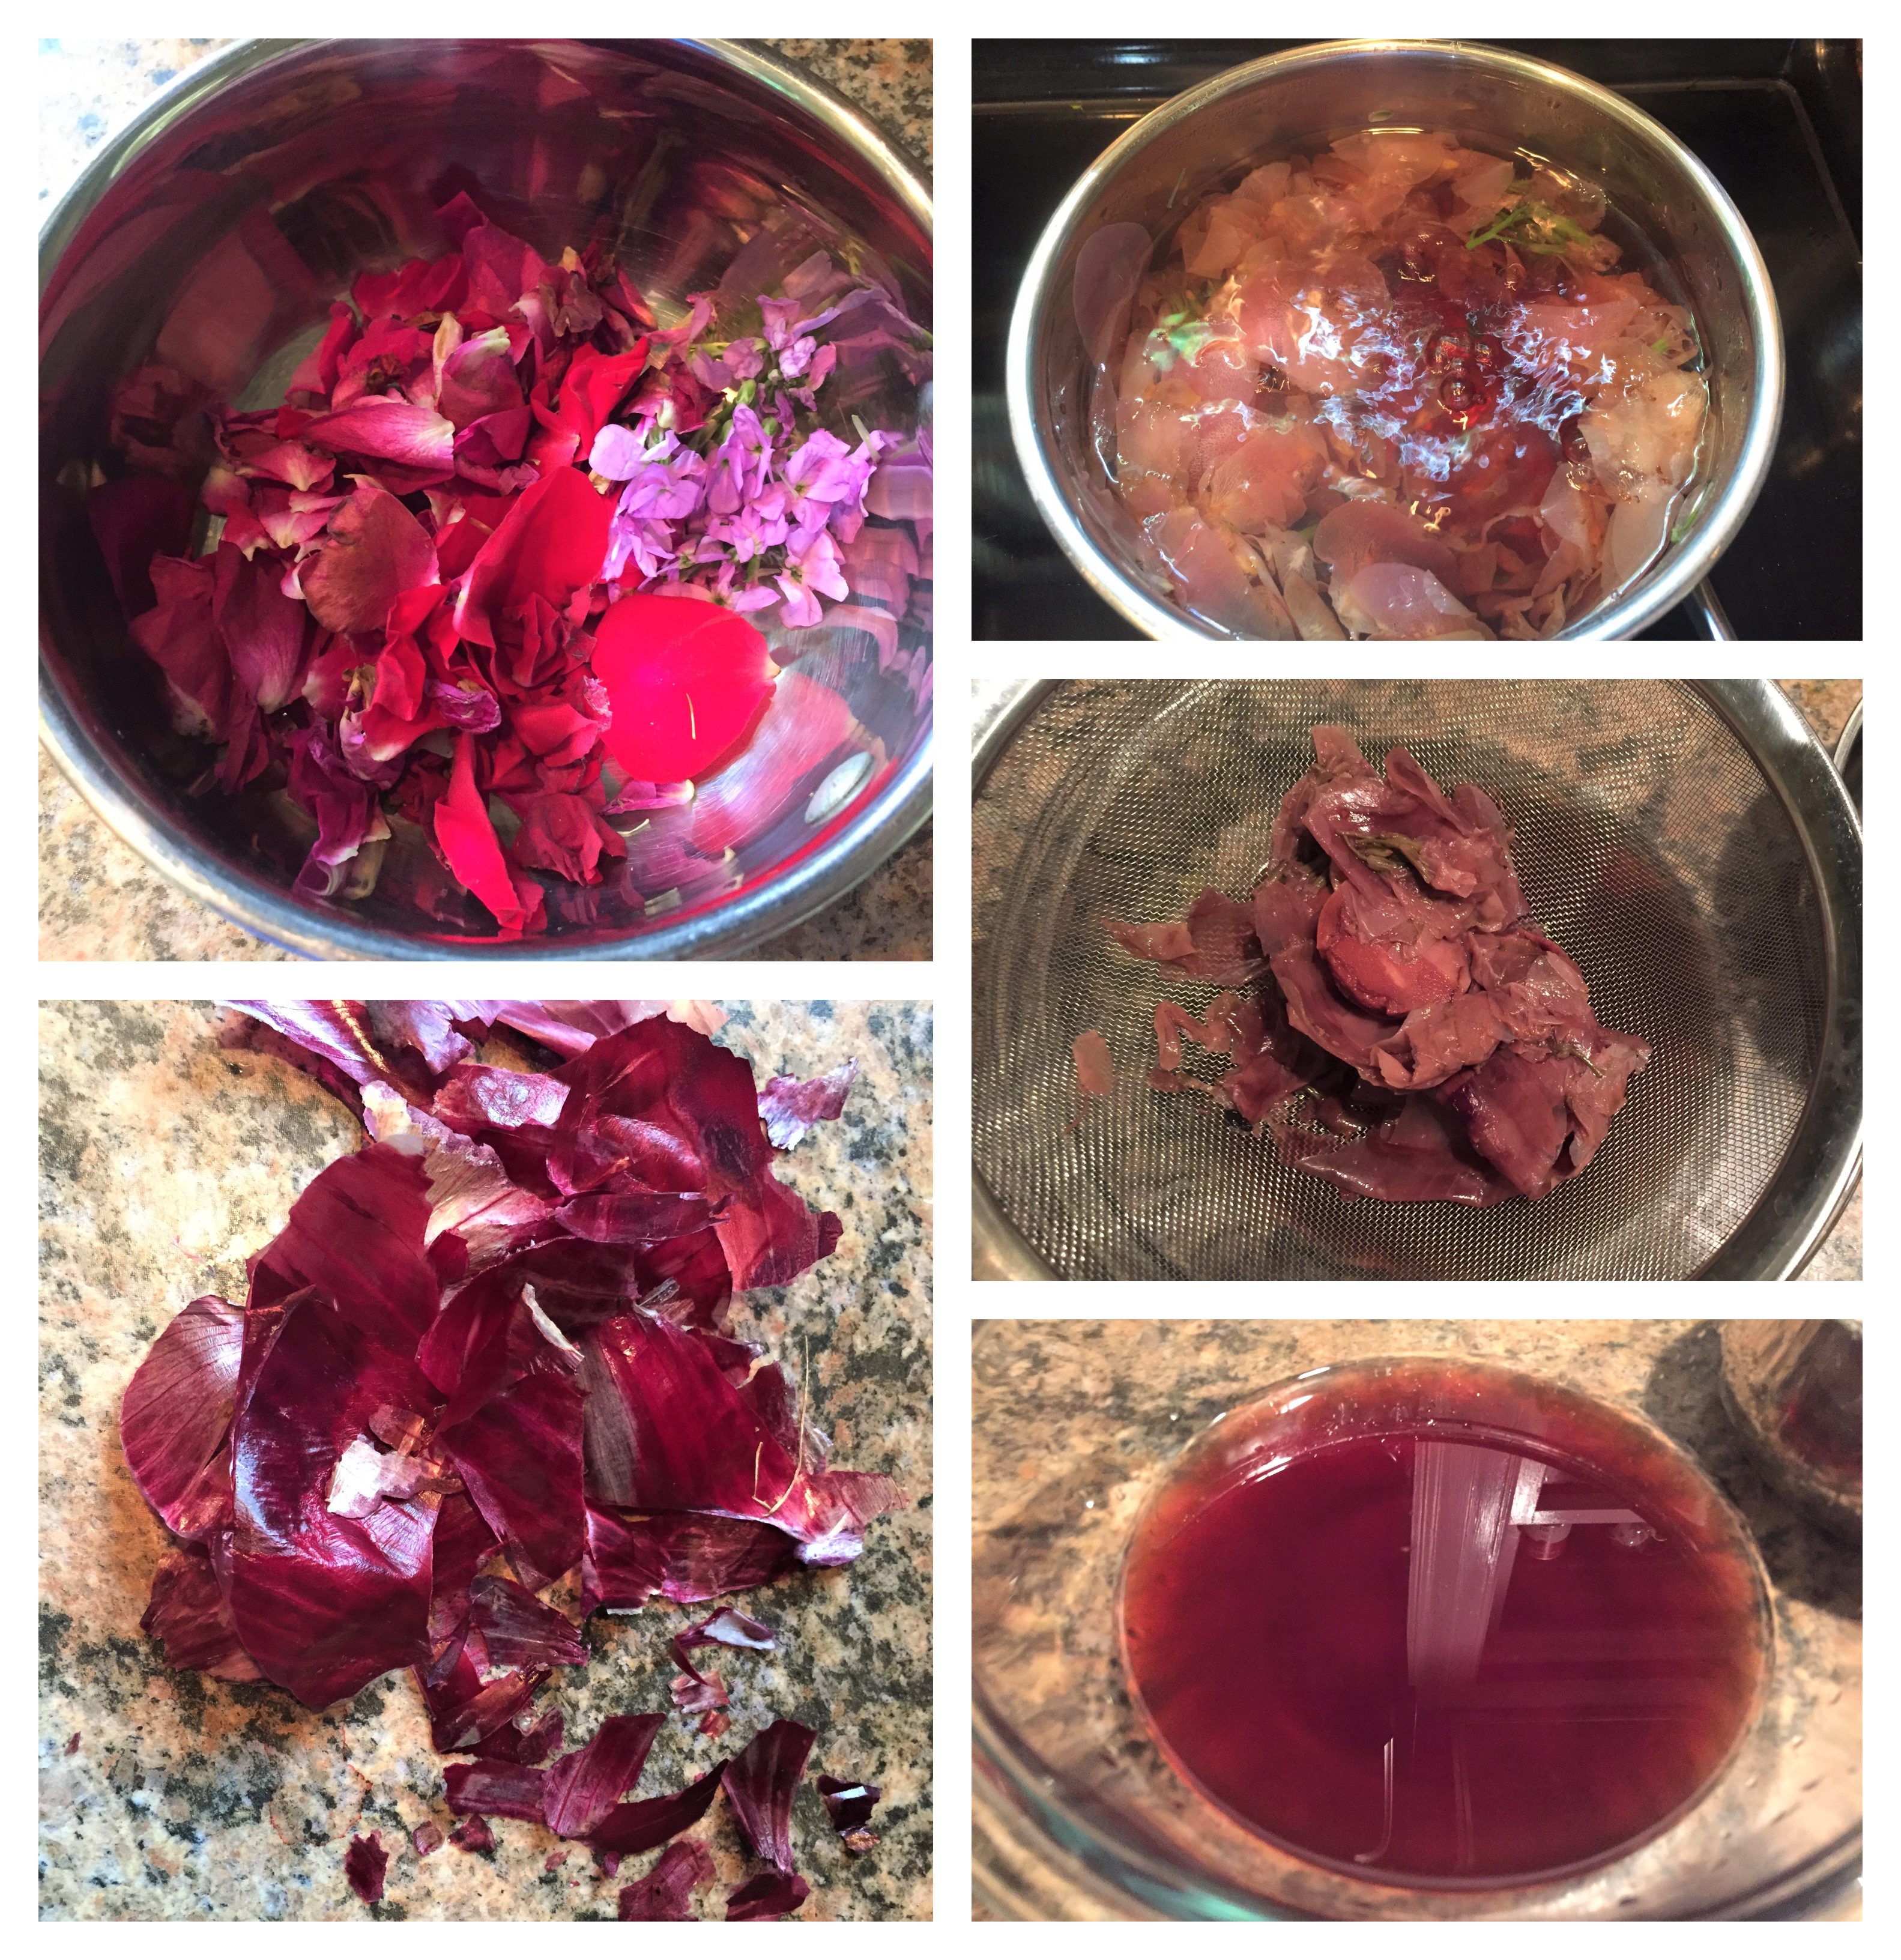
Once the masks were dry and ready to be tie-dyed, I started creating my dyeing liquids by boiling my petals and turmeric in separate pots with a good amount of water, covered, for over an hour. As the petals were boiling, I started getting anxious that the liquid wouldn’t be saturated with enough color, so I threw in some red onion skins about halfway through to help impart a deeper hue. I then strained each of my dyeing liquids separately and returned them to their pots.
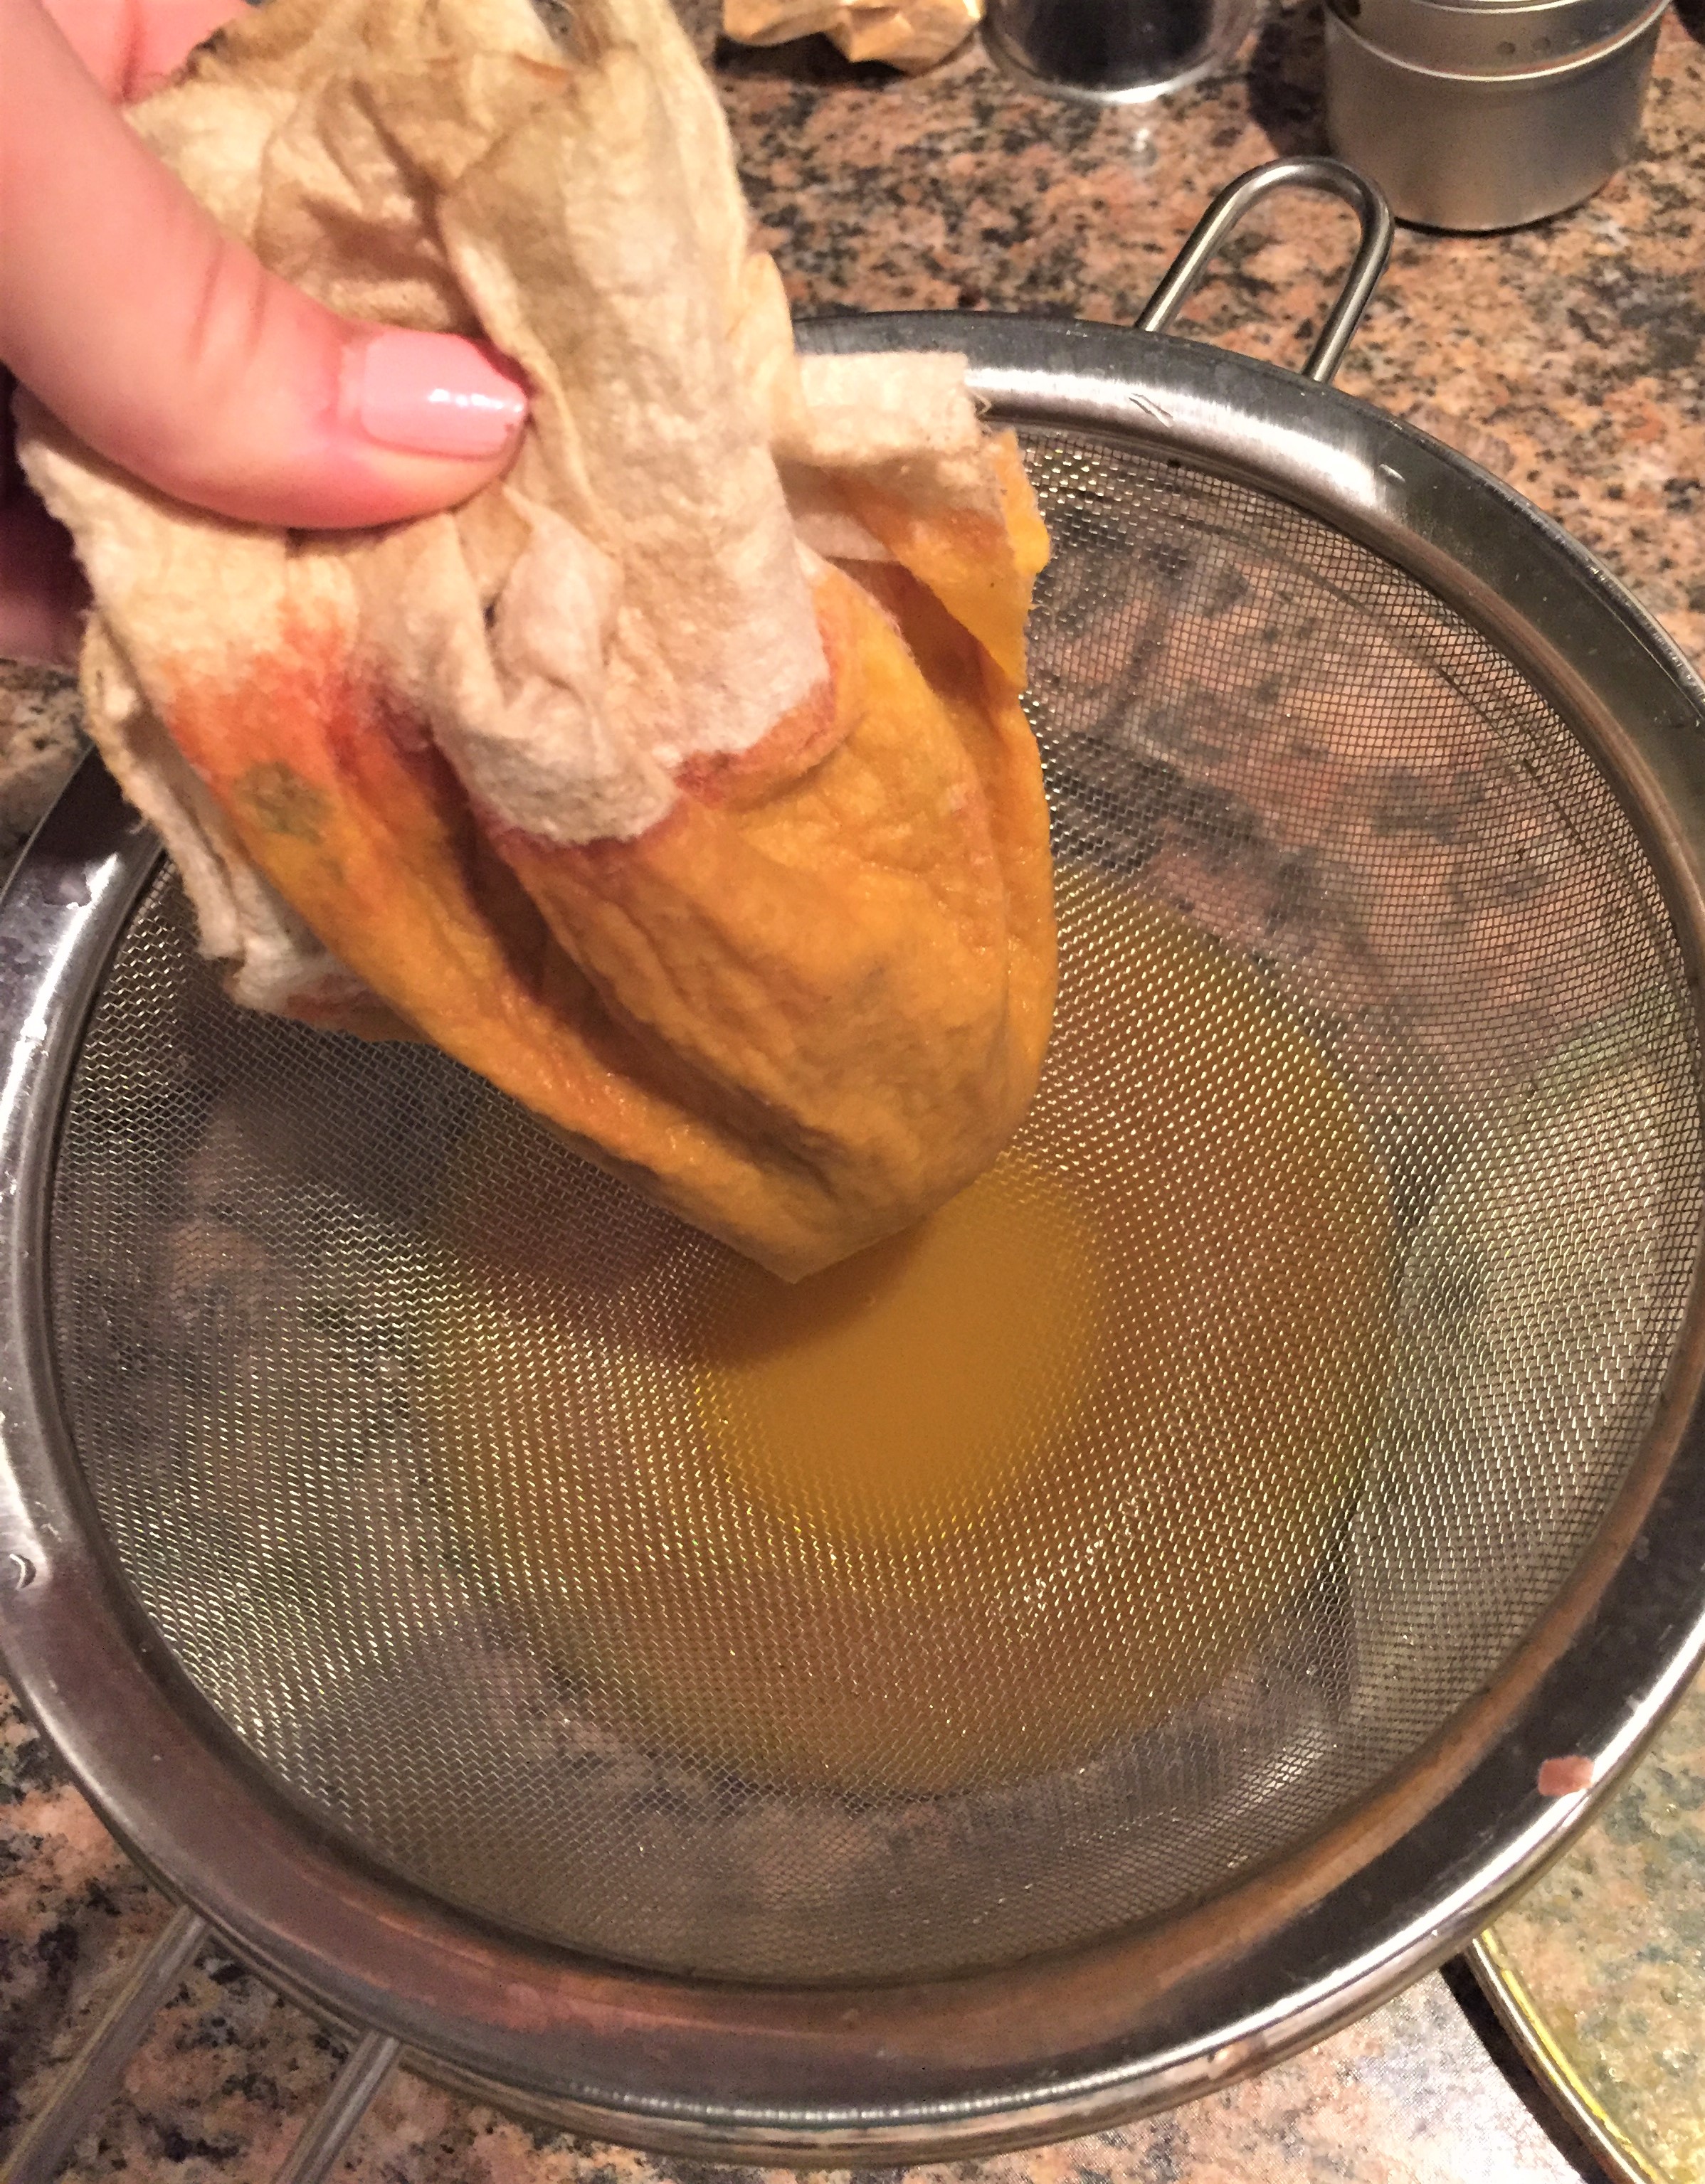 The turmeric dye simply needed to be boiled and then finely strained
In my research, I read a number of blogs about conventional and natural tie-dyeing that recommended using an old pot in which to do your dying. Because of this fear of ruining my pots, I only used two, did the turmeric and petal dyes at once, let my masks soak up those colors overnight, and then the next day cleaned out one of my “dyeing pots” and did the process with the red wine separately. Note #1: These natural materials did not ruin my pans. The turmeric may make my food come out a little more yellow for the first few uses of that particular pot, but I don’t see any harm in that.
Tying and dyeing
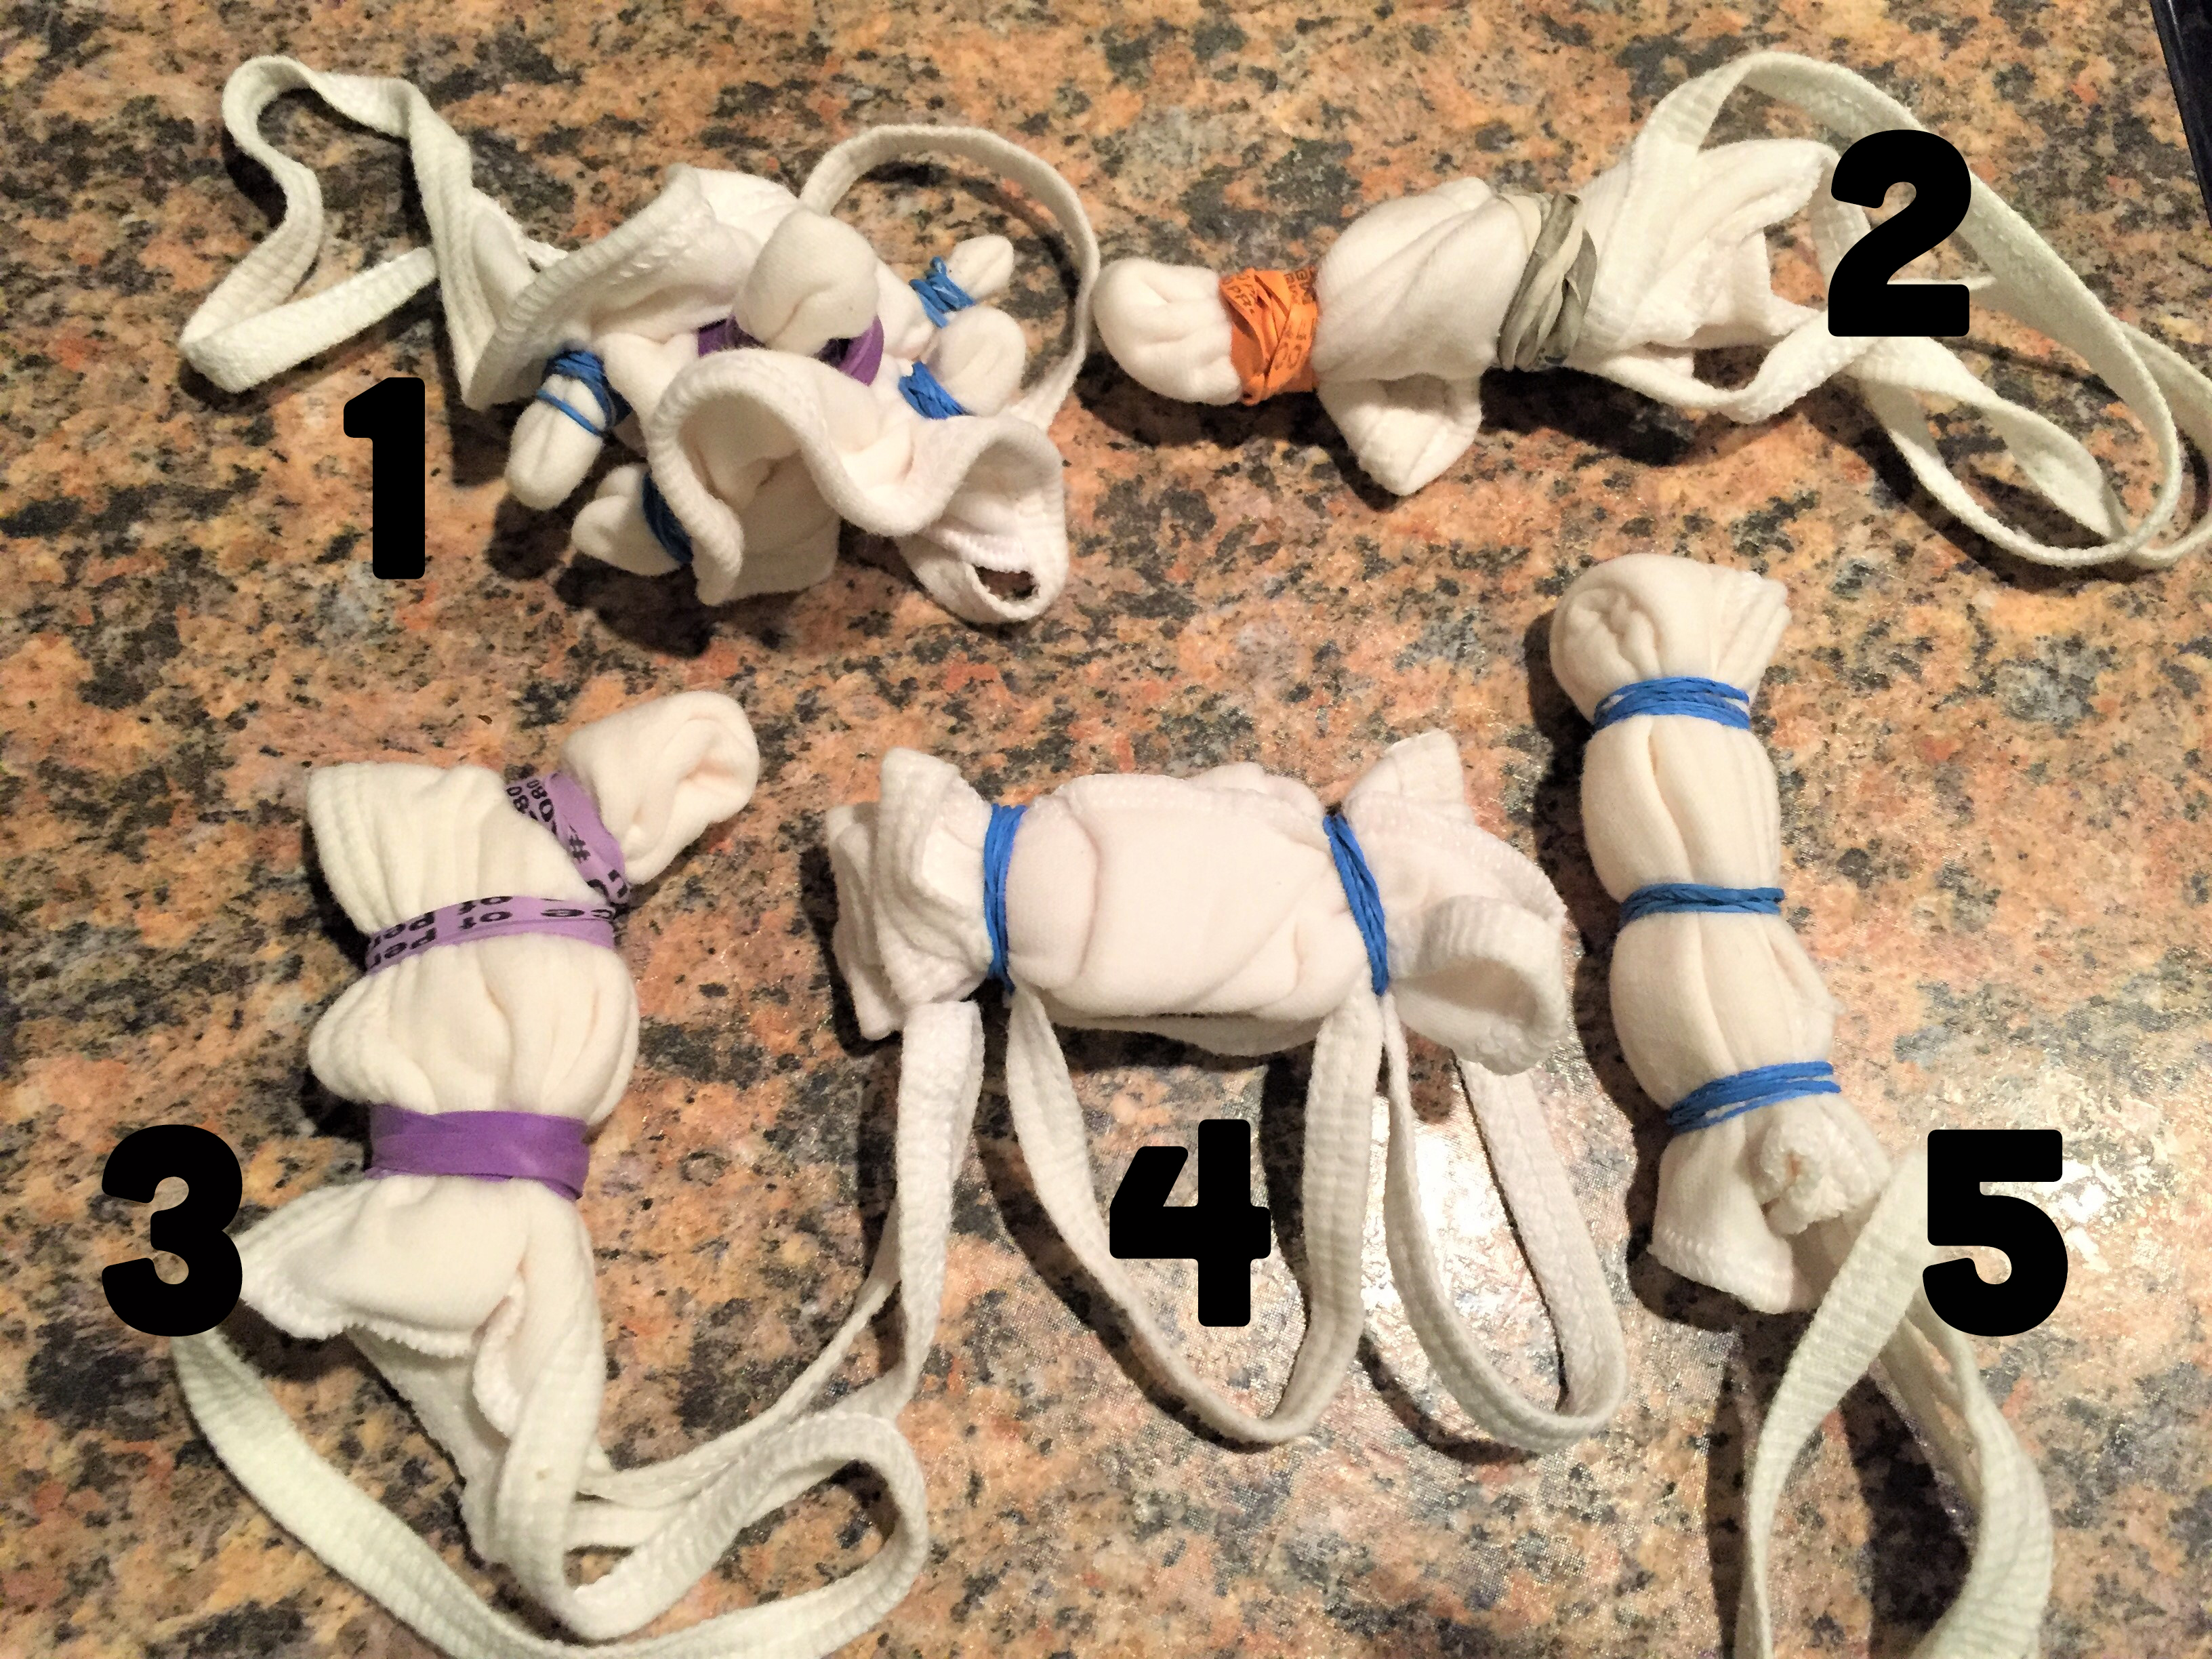
I had already spent so much time researching how to make natural dyes, I really didn’t invest too much time into figuring out how to tie fabrics off to create the best design, so I winged it. I figured a nice variety of folds, bunching and scrunching would be the best bet for my natural tie-dye masks. Check out the photo to see my different tying methods and follow their numbers through to see the final result.
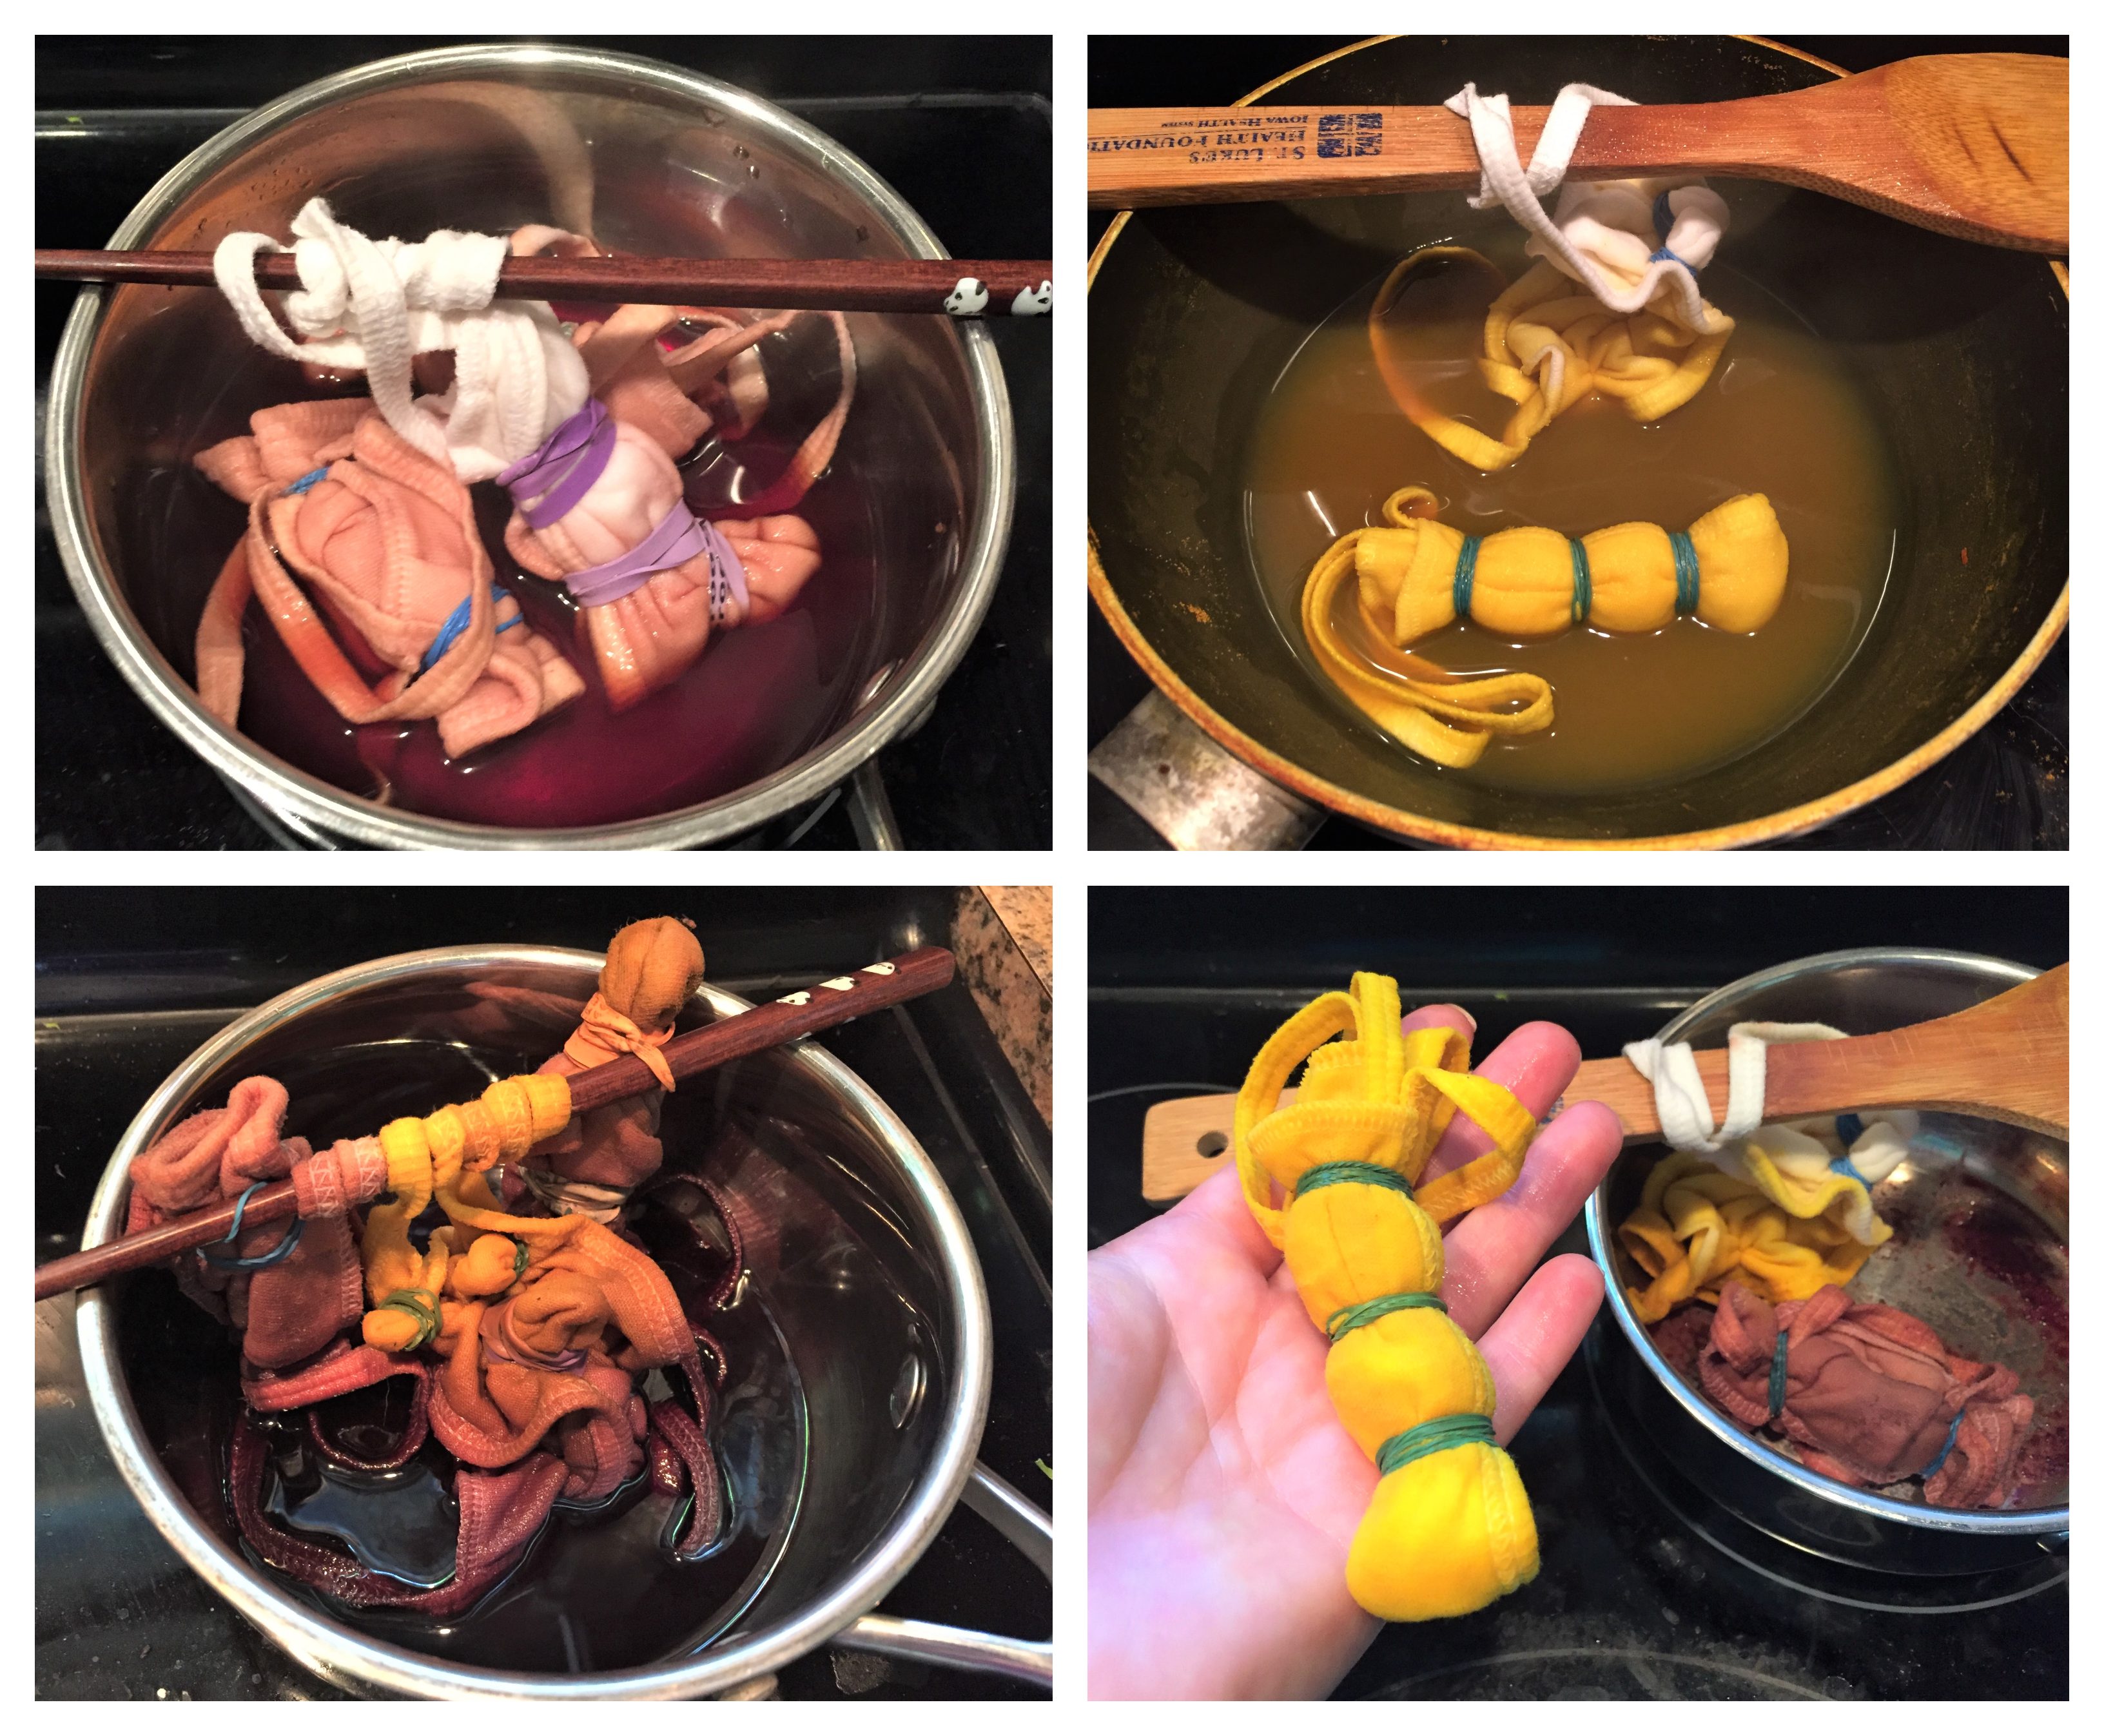 Flower dye (top left), turmeric (top right), wine (bottom left), and how the masks looked after soaking overnight (bottom right)
Once tied off, I decided what combo of colors I wanted for my party of 5. Some would be mono and some would be a combo of colors. I placed the masks, either fully or just partially submerged (and held in place with a chopstick if it was going to be multi-colored), into the simmering dye liquid, covered the pots and let them sit and soak for at least an hour over low heat. I then turned off the heat on the stove and left them there to continue to soak for several hours or overnight, depending on how many additional colors they were destined for.
Unwrapping & finishing my natural tie-dye creations
Once all my masks had thoroughly steeped in dye for many hours, it was finally time for the great unraveling and reveal! At first look, the colors were amazing. The turmeric was bright and cheerful, the pink was subtle and the wine-red was deep and pretty. At the advice of one of the many blogs I had referenced, it recommended leaving the fabrics on a cooling rack and letting them dry so that the colors fully set into the fabric.
Note #2: I believe this was a mistake. I think taking the rubber bands off when the fabric was still wet with dye and then laying them out caused the dye to bleed over my natural tie-dye patterns, hence making them look smudgy and less noticeable. If I were to do this experiment again, I would do the rinse-with-cold-water step directly after taking the rubber bands off. So, please note this if you try your own natural tie-dye experiment!
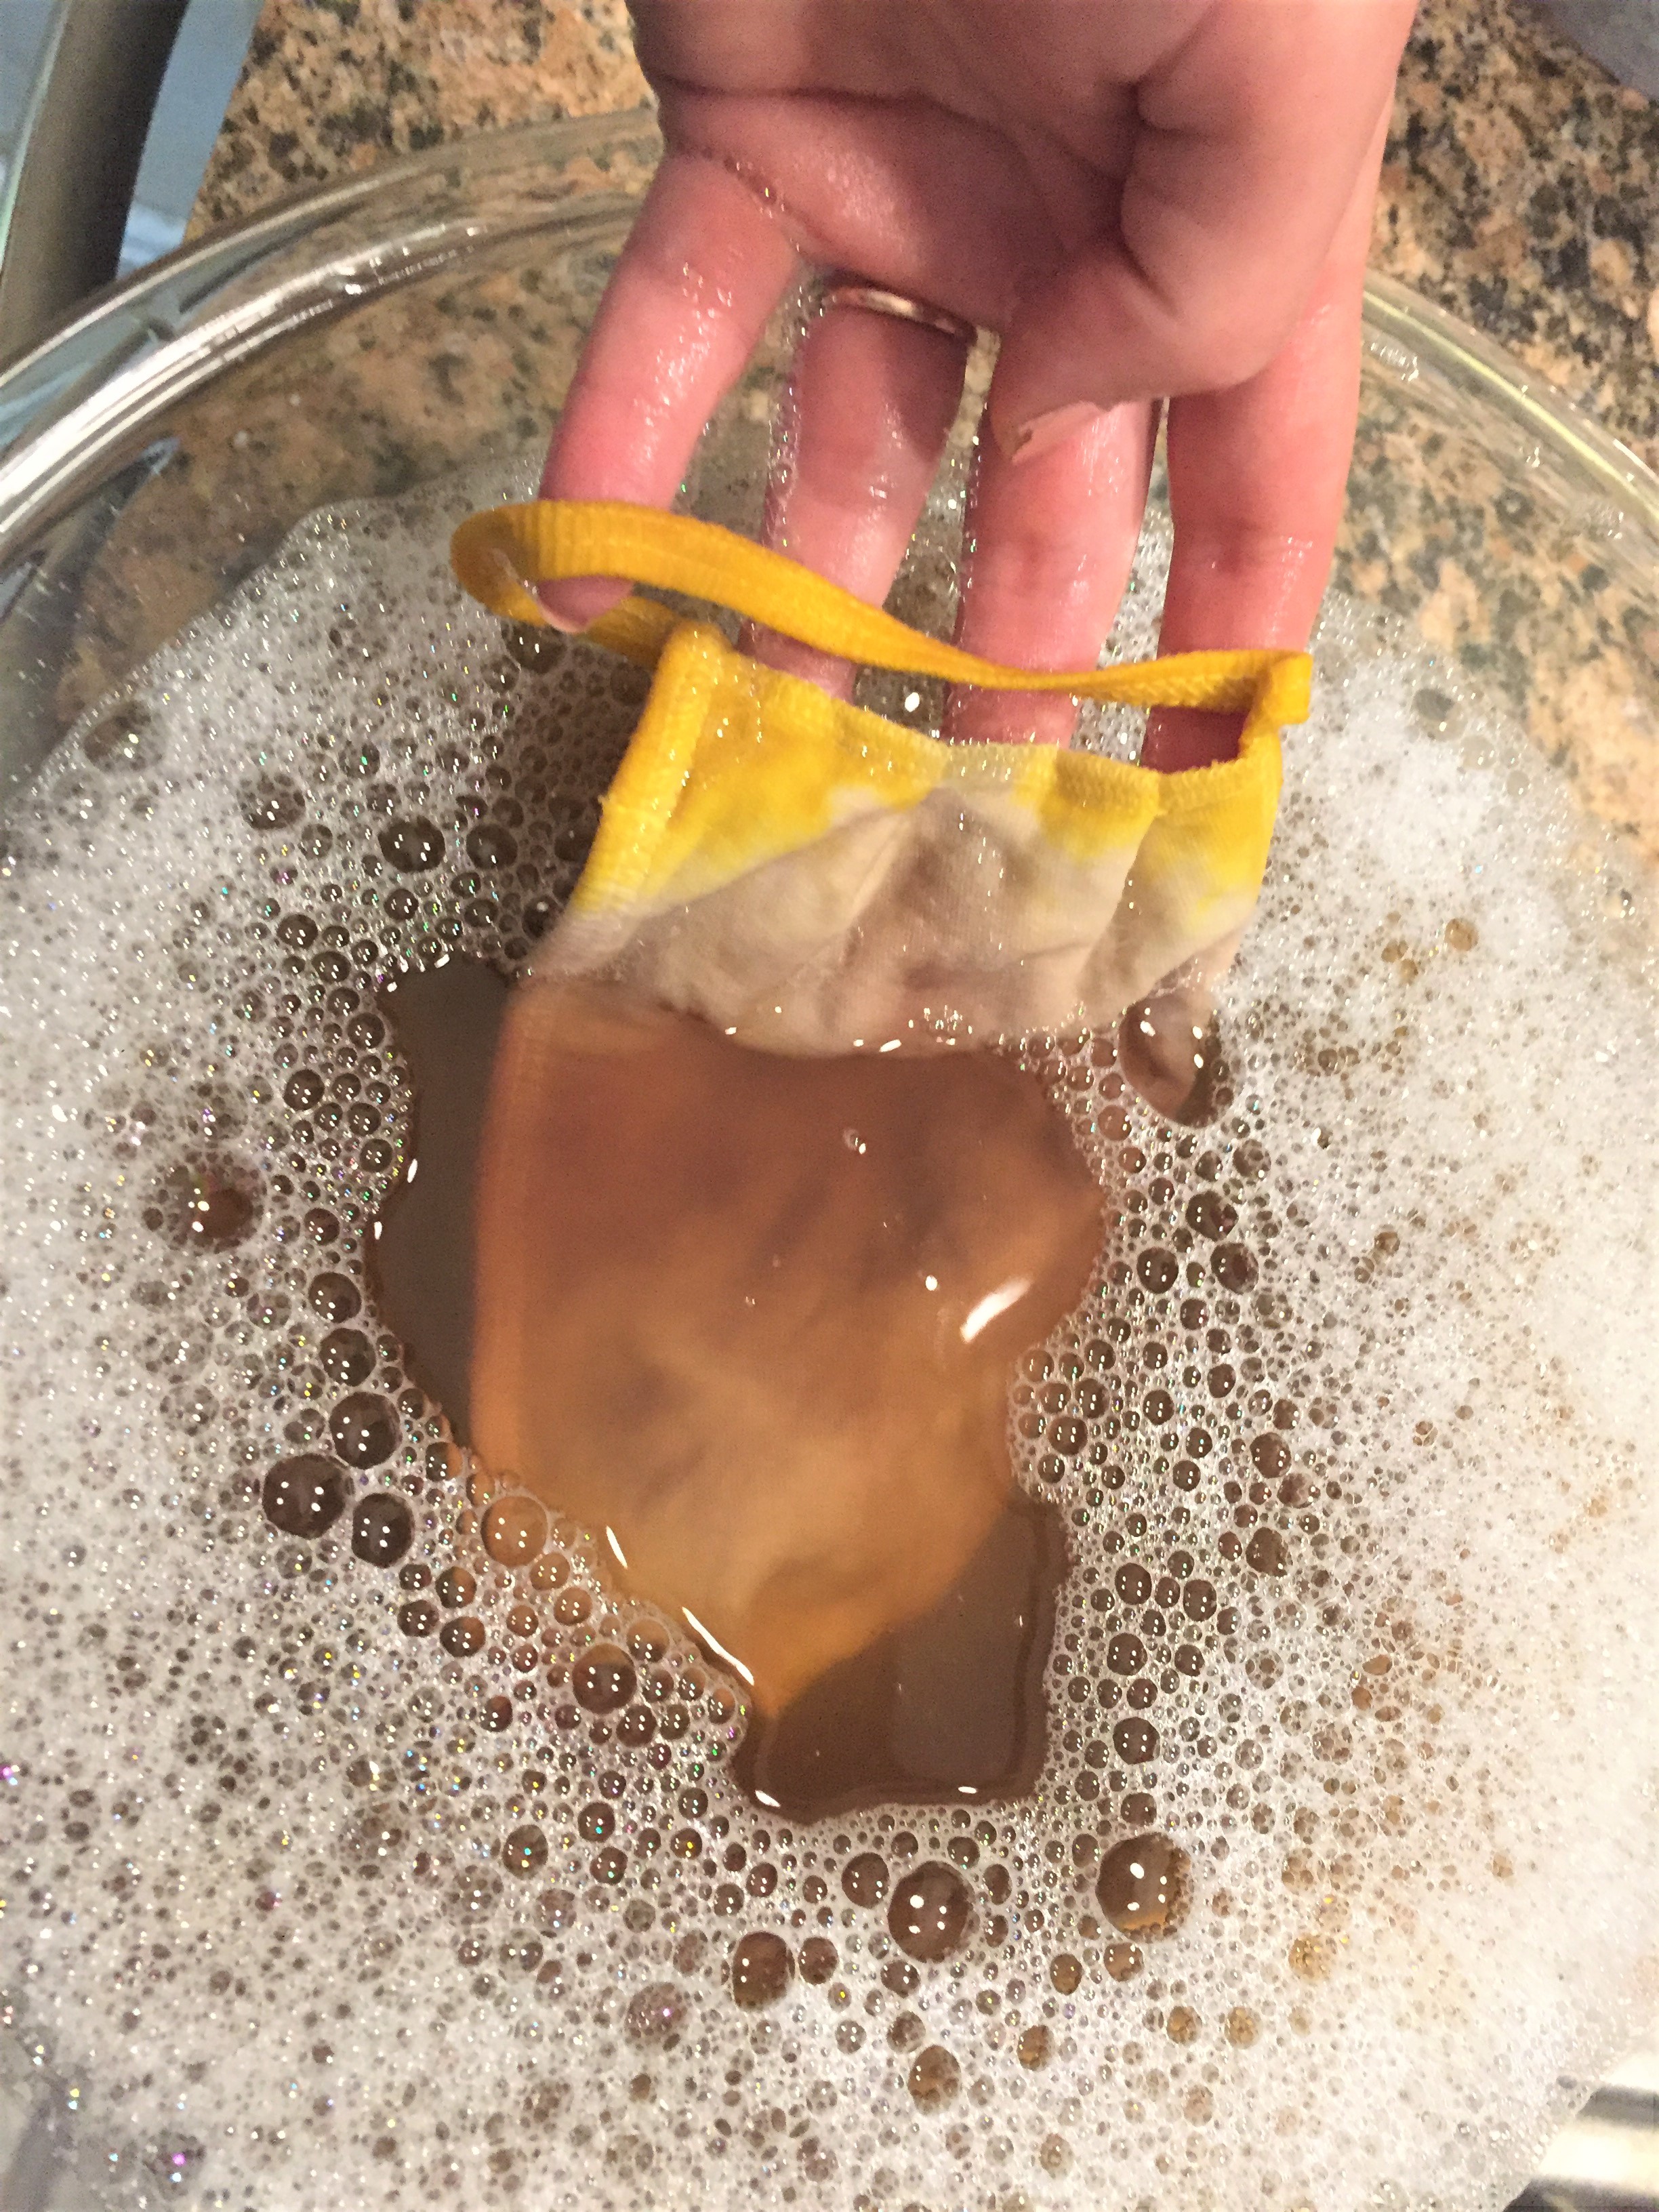 Washing with dish soap, much better!
Once my masks had dried for many hours (and run their colors slightly), I finally gave them a rinse under cold water until the water ran clear. I then started to handwash them, one by one, in a bowl with warm water and some laundry soda. Note #3: I quickly realized some of the dyes had a reaction with the laundry soda. It seemed to alter their colors slightly, making them dingy-looking. After washing a couple of masks this way and watching the colors change before my eyes, I switched out my soda with a little bit of dish soap and was relieved to find it was gentler on my natural tie-dye masks. I rinsed all the masks again and let them dry.
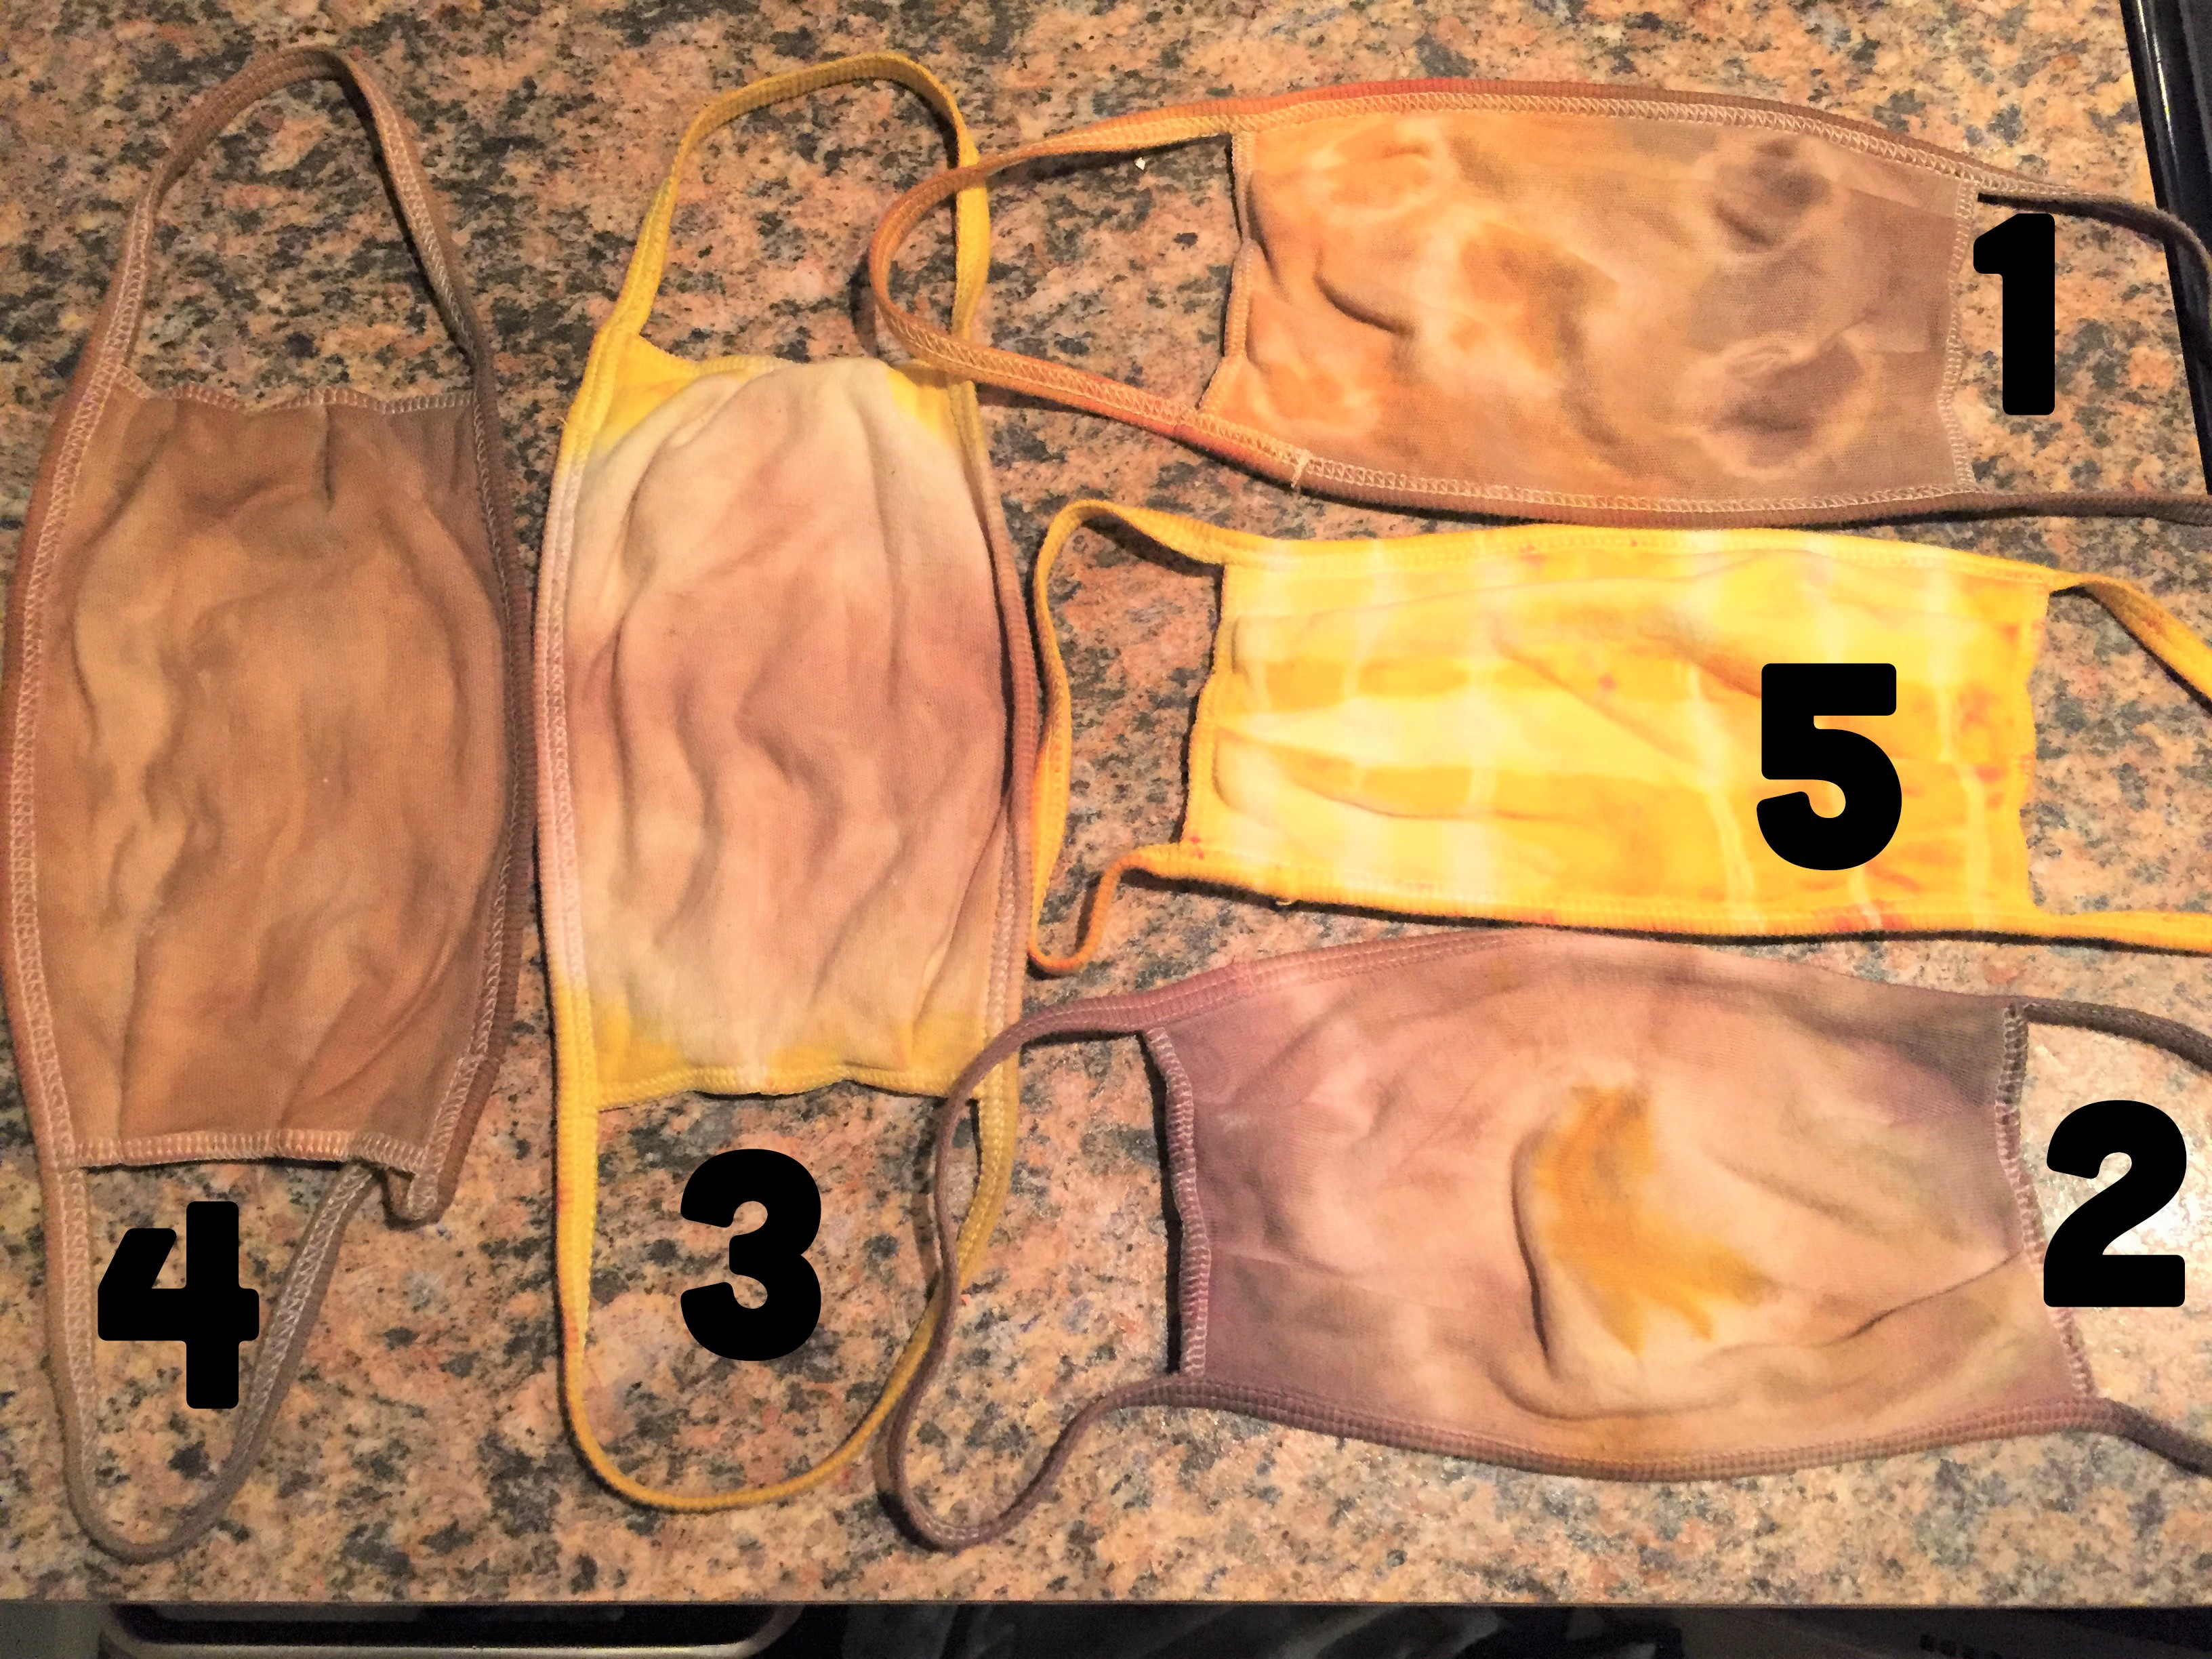
The final results
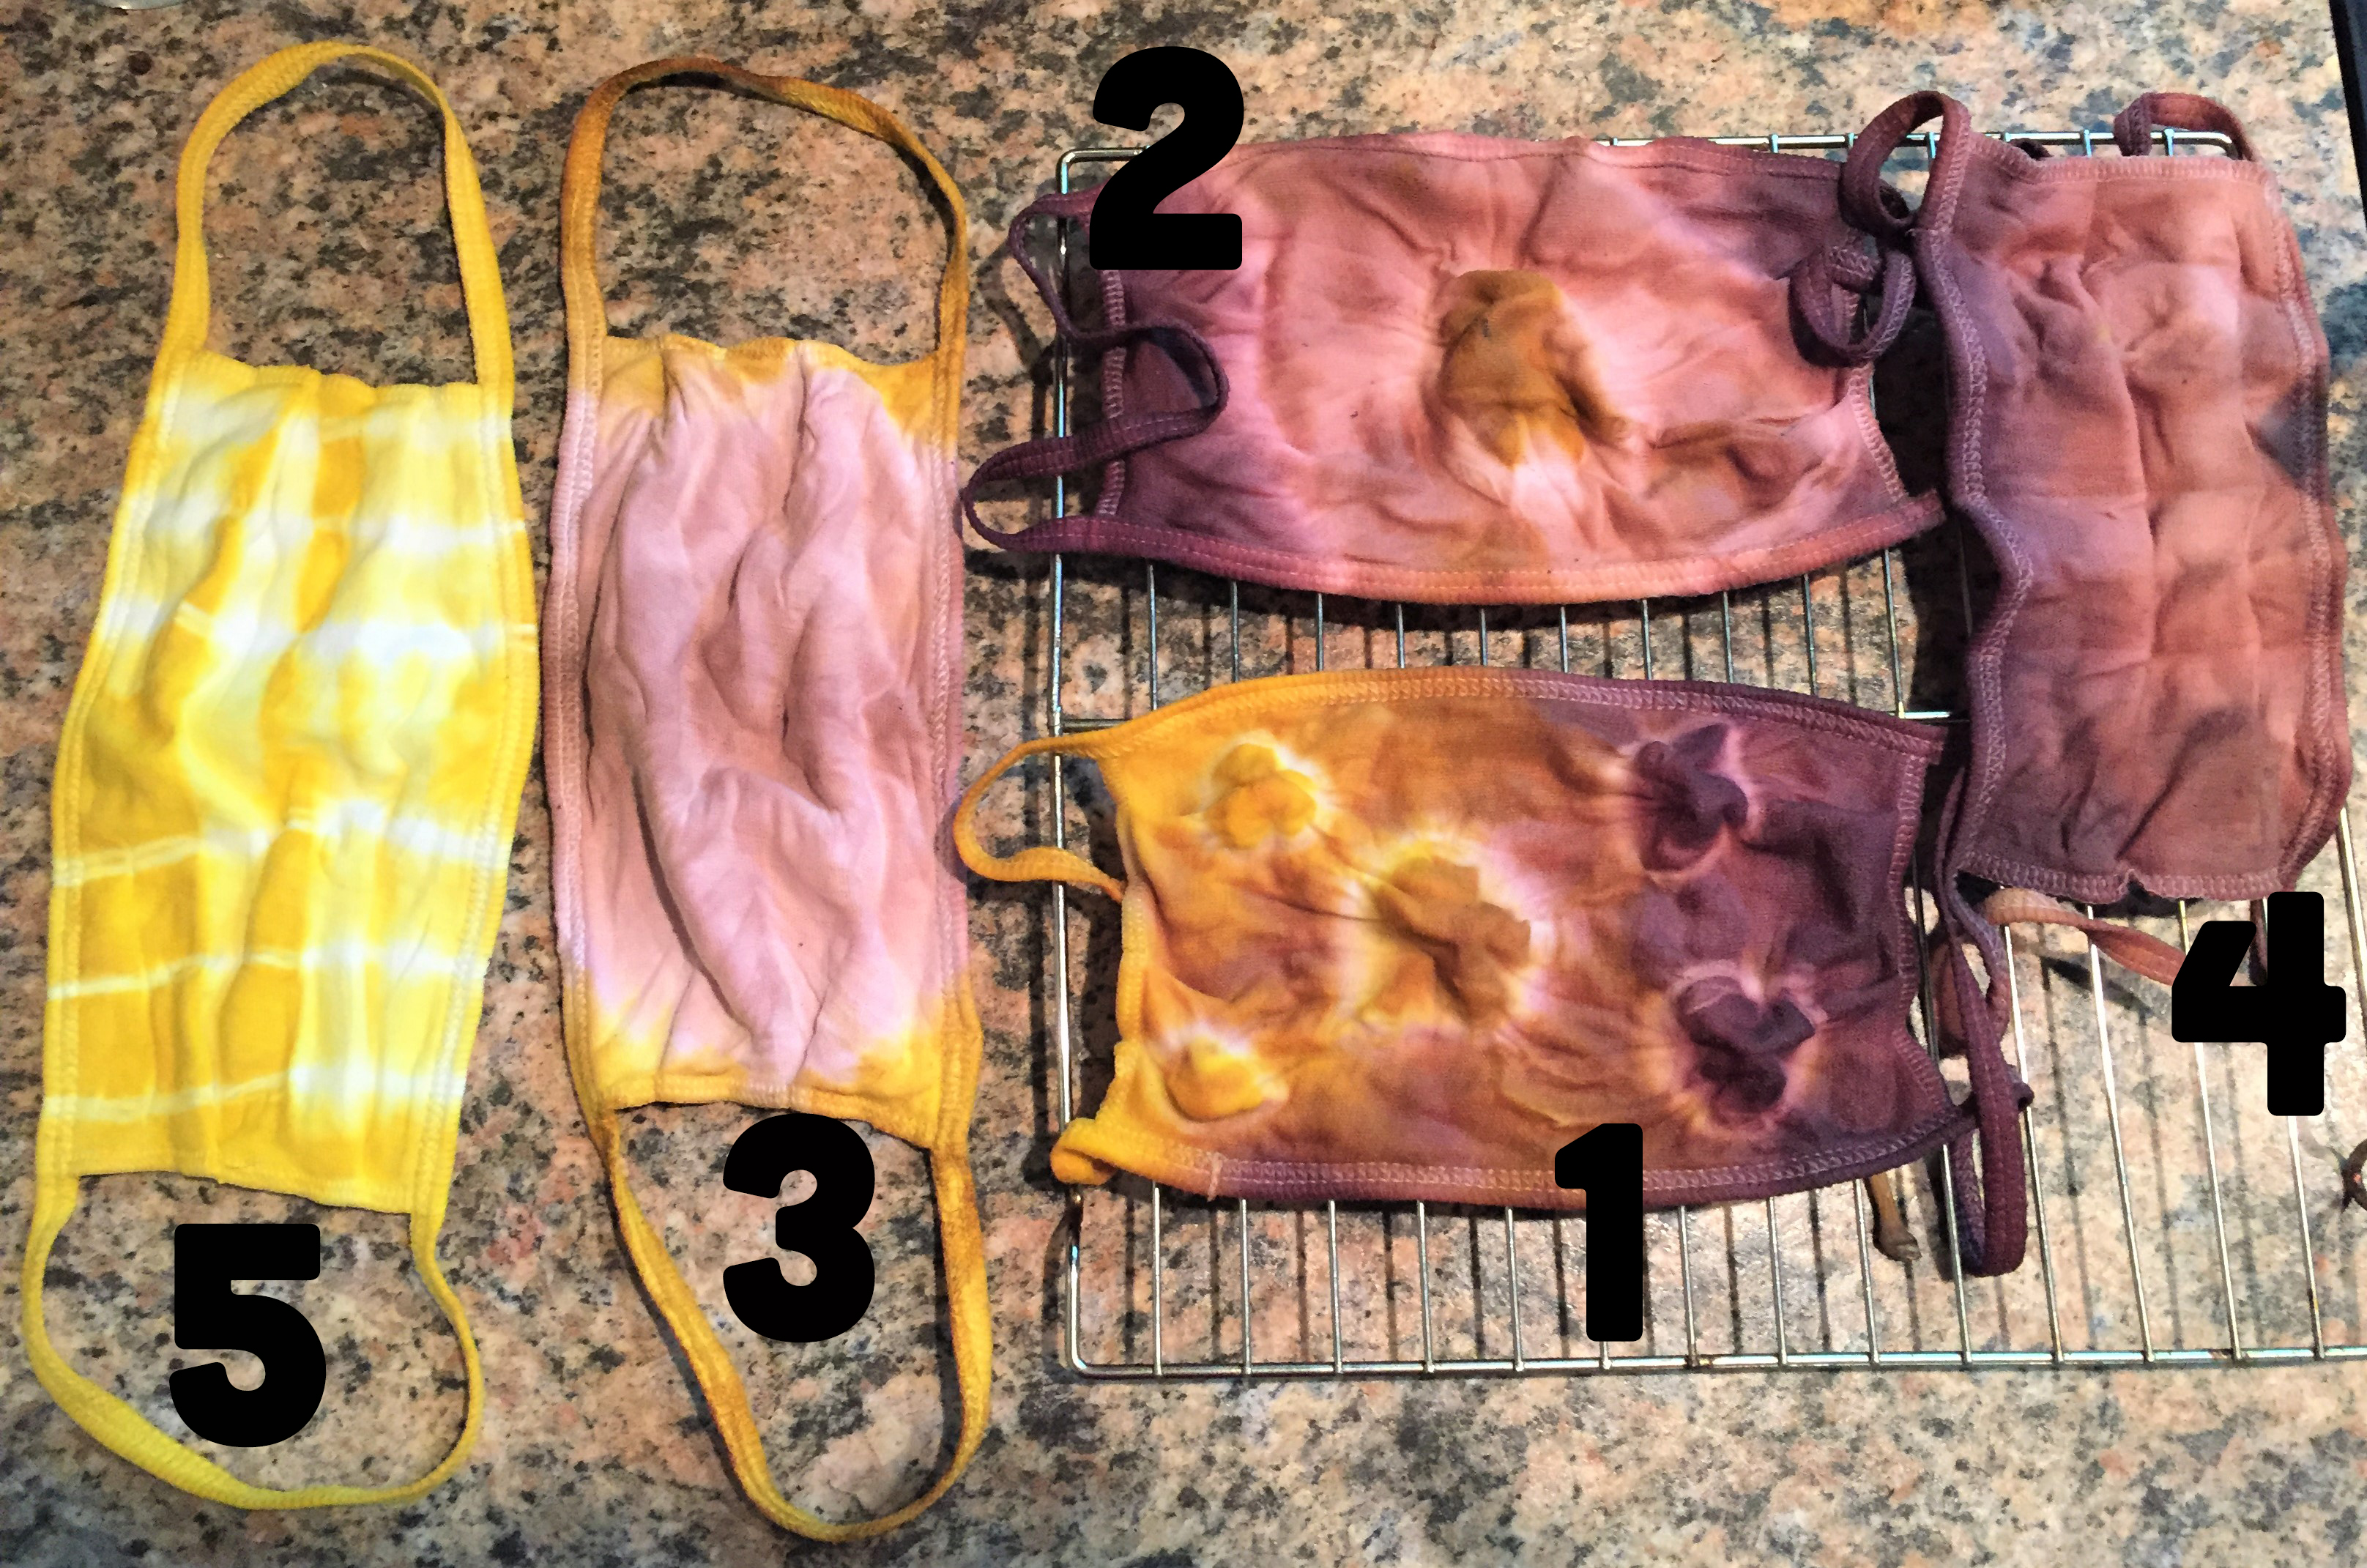
You can see in the photo to the right, #1 and #4 were the casualties of this unanticipated chemical reaction of the laundry soda, and they look a bit dull. The others turned out OK, but as you can see the natural tie-dye colors pictured are much fainter than they were when I first took off the rubber bands. My favorite, by far, was the only one that was strictly dyed with turmeric (#5). Both the pattern and the color seemed to hold up the best. And while the finished products weren’t as vibrant as I had hoped, guess what? They definitely don’t look like tighty whities anymore and they serve their purpose of keeping my co-workers, shoppers and myself safe, and that’s really the whole point, isn’t it?
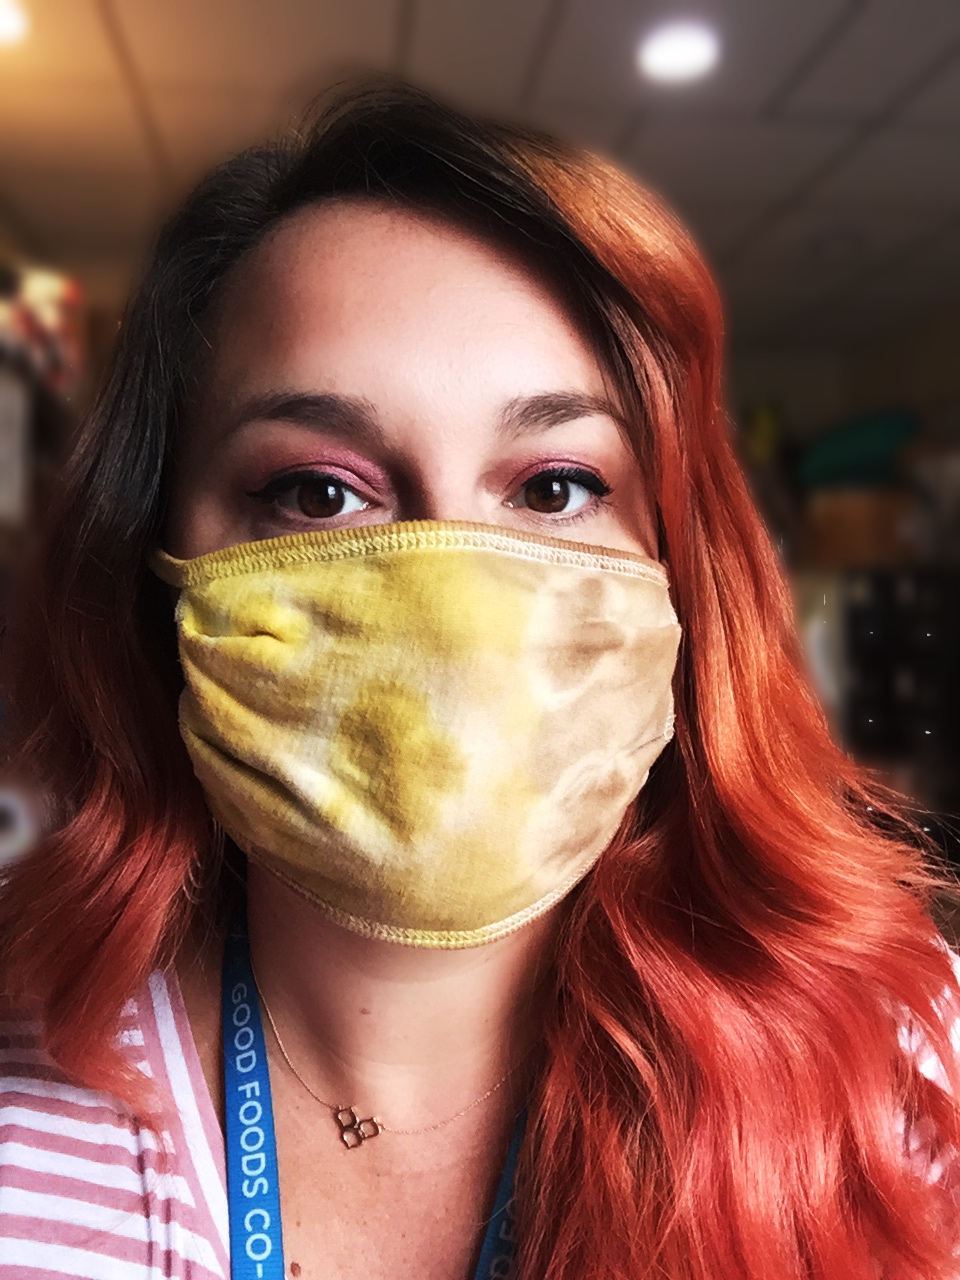 Me wearing mask #1
So, kids, what have we learned here? Natural tie-dye is a fun experiment and we should stick to turmeric, for sure, and maybe some red cabbage and yellow onion skins next time? Make sure to let your colors soak in well and then rinse as soon as the rubber bands are off. Don’t wash with laundry soda, but instead use a gentle soap and warm water. Are you ready to experiment? Share your results with us on social media, and be sure to tag Good Foods Co-op!